


Аннотация
This guide provides a comprehensive pedagogical framework for learning how to play the baritone horn, intended for aspiring musicians in 2025. It deconstructs the learning process into seven sequential steps, beginning with the foundational aspects of instrument anatomy, assembly, and correct posture. The document proceeds to detail the physiological mechanics of sound production, focusing on diaphragmatic breathing and the formation of a proper embouchure. Subsequent sections systematically introduce valve fingerings, music notation, and fundamental techniques such as scales and articulation. A significant emphasis is placed on the qualitative aspects of musicianship, including tone refinement, intonation accuracy, and the development of effective practice habits informed by principles like distributed practice. The guide culminates in a discussion of musical expression, encouraging the learner to transition from technical exercises to performance. By integrating technical instruction with principles of music pedagogy and psychology, this text aims to provide a holistic and empathetic pathway for beginners to achieve proficiency and find their own musical voice on the baritone horn.
Основные выводы
- Master diaphragmatic breathing; your power and tone originate from your core, not your chest.
- Develop a consistent embouchure by buzzing on the mouthpiece alone before using the horn.
- Practice long tones daily to build a stable, rich, and well-supported sound.
- Learning how to play a baritone horn involves mastering scales to build finger dexterity and musical fluency.
- Structure your practice with clear goals, focusing on consistency over marathon sessions.
- Use a tuner to develop your ear and ensure you are playing with accurate intonation.
- Listen intently to professional players to cultivate your concept of a beautiful baritone tone.
Оглавление
- Step 1: Foundational Understanding and Instrument Assembly
- Step 2: The Heart of the Sound – Breathing and Embouchure
- Step 3: Producing Your First Notes
- Step 4: Developing Technique and Dexterity
- Step 5: Refining Your Tone and Intonation
- Step 6: Practice Strategies for Meaningful Progress
- Step 7: Playing Music and Finding Your Voice
- Часто задаваемые вопросы (FAQ)
- Заключение
- Ссылки
Step 1: Foundational Understanding and Instrument Assembly
Embarking on the study of a musical instrument is an exercise in structured curiosity. It involves a dialogue between the physical self and an inanimate object, transforming breath and motion into expressive sound. The baritone horn, with its mellow and vocal character, offers a particularly rewarding entry point into the world of brass playing. Before a single note is produced, however, a foundational understanding is paramount. This initial phase is not merely procedural; it is about building a relationship with the instrument, understanding its physical properties, its history, and the proper way to hold and care for it. This respect for the instrument as a tool and partner is the bedrock upon which all future musical development is built. We must first learn the language of the object before we can ask it to speak for us.
The Baritone Horn Family: Euphonium vs. Baritone
A common point of confusion for those beginning their journey concerns the very identity of their instrument. Is it a baritone, or is it a euphonium? The terms are often used interchangeably in school band settings, yet they denote distinct instruments with unique timbral qualities and historical lineages. The distinction lies in a concept central to brass instrument design: the bore profile. The bore is the internal passageway of the tubing. An instrument can be primarily conical, meaning its tubing gradually increases in diameter from the mouthpiece to the bell, or it can be primarily cylindrical, maintaining a relatively consistent diameter for much of its length before flaring at the bell.
The true baritone horn possesses a predominantly cylindrical bore, similar to a trombone. This design gives it a brighter, lighter, and more focused sound, one that can cut through an ensemble with clarity. It is agile and speaks with a certain directness. Imagine its sound as a clear tenor voice.
The euphonium, conversely, features a conical bore. This continuous flaring of the tubing results in a sound that is darker, broader, and warmer. It has a powerful, rich, and enveloping quality, often described as being very similar to the human voice, but with a profound depth. Think of it as the robust baritone voice in a choir. While the fingerings and general playing technique are identical for both, the sonic result is different. The choice between them often comes down to the desired tonal role within an ensemble. For the purposes of this guide, we will use the term "baritone horn" in a general sense that accommodates both, as the fundamental principles of how to play a baritone horn are universal. When you are ready to select an instrument, listening to recordings of both can help you decide which tonal character speaks more to you.
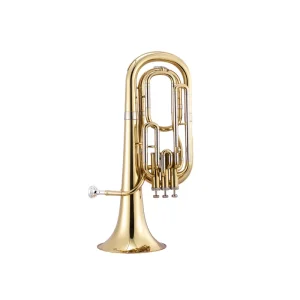
Anatomy of Your Baritone Horn
To learn to play the baritone horn is to learn to operate a marvel of acoustic engineering. Understanding its constituent parts demystifies the instrument and fosters a sense of competent ownership. Let us walk through the anatomy of a typical three-valve, compensating baritone horn.
- Мундштук: This is where the magic begins. It is not just a funnel but a carefully crafted component that channels the vibration of your lips (your buzz) into the instrument. Mouthpieces come in various sizes and shapes, affecting tone and playability.
- Leadpipe: The tube extending directly from the mouthpiece receiver. It is the first part of the horn that the vibrating air column enters.
- Клапаны: These are the "keys" of the baritone horn. Most beginner and intermediate models have three piston valves. When a valve is depressed, it redirects the air through an extra length of tubing, effectively making the instrument longer and lowering its pitch.
- Valve Casings: The cylindrical chambers that house the pistons.
- Tuning Slides: Each valve has a corresponding tuning slide, which is a U-shaped piece of tubing that can be moved to make fine adjustments to the pitch of that valve.
- Слайд основной настройки: This is the largest slide, and it adjusts the overall pitch of the instrument. You will use this to tune your baritone horn to a reference pitch, such as from a piano or an electronic tuner.
- Bell: The large, flared end of the horn from which the sound emanates. The size and shape of the bell significantly influence the instrument's projection and tone color.
- Water Key (or "Spit Valve"): A small levered key that allows for the release of condensed moisture from inside the instrument.
Take a moment to identify each of these parts on your own instrument. Press the valves and observe how they move. Gently move the main tuning slide in and out. This tactile exploration is a vital first step in your learning process.
Proper Assembly and Care
A musical instrument is a durable tool, but it requires consistent care to function correctly. Your daily routine should include a few simple steps for assembly and maintenance. When you first receive your instrument, perhaps from a reputable source for high-quality baritone horns, you will need to assemble it.
- Inserting the Mouthpiece: Place the mouthpiece into the leadpipe receiver. Insert it gently and give it a small, soft twist to secure it. Never force or hit the mouthpiece into place, as this can cause it to get stuck—a common and frustrating problem for new players.
- Initial Maintenance Check: Before playing, ensure the valves move freely. Unscrew the top valve cap and apply a few drops of high-quality valve oil directly onto the piston. Re-insert the valve, ensuring it is aligned correctly (most have a guide to prevent incorrect rotation), and screw the cap back on. Depress the valve a few times to distribute the oil. Do this for all three valves. The slides should also move smoothly. If they are sticky, they may need a small amount of slide grease.
After each practice session, a simple cleaning routine is necessary. Use a soft cloth to wipe down the exterior of the horn, removing fingerprints. Press the water key to empty any condensation. It is also good practice to remove the mouthpiece and clean it with a dedicated mouthpiece brush and warm, soapy water. A clean instrument is not just a matter of hygiene; it is a matter of function. Debris and buildup can impede valve action and affect the sound.
Cultivating the Right Posture and Hold
Your body is an integral part of your instrument. Poor posture can lead to physical strain, shallow breathing, and a constricted sound. The goal is to create a posture that is relaxed, stable, and allows for deep, unimpeded breaths.
Whether you are sitting or standing, the principles are the same.
- Sit or Stand Tall: Imagine a string pulling the crown of your head gently toward the ceiling. Your spine should be straight but not rigid. Avoid slouching at all costs. If sitting, sit toward the front edge of your chair, with both feet flat on the floor.
- Relax Your Shoulders: Tension is the enemy of good brass playing. Consciously drop your shoulders and allow your arms to hang loosely.
- Holding the Horn: The baritone horn rests on your left arm or lap. Your left hand will wrap around the tubing to support the instrument's weight, with your fingers comfortably gripping the valve cluster or nearby tubing. Your right hand is for the valves. The pads of your fingertips should rest lightly on the valve caps. Your right thumb should rest comfortably between the first and second valve casings. Your fingers should be curved naturally, as if holding a ball. There should be no tension in your hands or wrists.
Bring the instrument to your lips; do not lower your head to the instrument. This maintains the alignment of your spine and keeps your airway open. Holding the instrument might feel awkward at first, but with time, it will become a natural extension of your body. This union of player and instrument is the physical starting point for the art of music-making.
Step 2: The Heart of the Sound – Breathing and Embouchure
The production of sound on a brass instrument is a wonderfully organic process. It is not the instrument itself that creates the initial vibration, but the player's own body. Your lips, supported by a column of air from your lungs, become the reed. The baritone horn then acts as a magnificent amplifier and resonator, taking that tiny vibration and shaping it into a rich, sonorous tone. Therefore, mastering the physical actions of breathing and forming an embouchure is the most fundamental task in learning how to play a baritone horn. Without a solid foundation here, all other efforts, from fingering to musical interpretation, will be compromised. This stage requires patience and a keen awareness of your own body.
Diaphragmatic Breathing: The Engine of Your Tone
Imagine trying to drive a car with only a tiny amount of fuel in the tank. You might be able to start it and move a few feet, but you will not get very far, and the journey will be sputtering and uncertain. The same is true of playing a wind instrument. The air you use is the fuel for your sound. Many people, in their daily lives, are "shallow breathers," using only the top portion of their lungs. This is insufficient for brass playing. We must learn to breathe deeply, using the full capacity of our lungs, powered by a large, strong muscle called the diaphragm.
The diaphragm is a dome-shaped muscle located at the base of your lungs, just above your abdomen. When you inhale correctly for playing, this muscle contracts and flattens, pulling downward. This creates a vacuum in your chest cavity, drawing air deep into the lower parts of your lungs.
Here is a simple exercise to feel this process:
- Sit or stand with good posture.
- Place one hand on your chest and the other on your stomach.
- Inhale slowly and deeply through your mouth, as if you are saying the syllable "ho."
- Focus on making the hand on your stomach move outward. The hand on your chest should remain relatively still. Your stomach expands because your diaphragm is pushing your abdominal organs down and out of the way.
- Exhale with a steady, consistent stream of air, as if you are blowing a gentle, warm wind to fog up a window. Feel your stomach muscles gently contract as they help push the air out.
This is the kind of breath you need. It is a full, relaxed, and open breath. Avoid raising your shoulders when you inhale; this is a sign of a shallow, tense breath that originates from the chest. Think of your torso as a large bellows. The goal is to take in a large volume of air without creating any tension in your neck, shoulders, or throat. This deep, supported column of air is what will sustain your notes and give them a full, confident sound.
Forming Your First Embouchure
The term "embouchure" refers to the way a player applies their mouth to the mouthpiece of a brass or wind instrument. It involves the precise positioning and tension of the facial muscles, lips, and jaw. A good embouchure is both firm enough to support the vibration of the lips and flexible enough to allow for changes in pitch.
Think of your embouchure as the gatekeeper of the air. It shapes the airstream and creates the initial buzz. While every individual's facial structure is slightly different, the general principles of a good baritone horn embouchure are consistent.
- Say the letter "M": Start by saying the letter "m" and holding the final position. Your lips should be together, relaxed, but touching.
- Firm the Corners: While keeping the center of your lips soft and relaxed, slightly firm the corners of your mouth. Think of the expression you might make just before smiling, but without actually pulling your lips back. The corners should feel anchored.
- Position the Jaw: Your jaw should be slightly lowered and pushed forward, creating a flat, firm chin. Avoid puffing your cheeks. The muscles around your mouth should be doing the work.
- Create an Aperture: The aperture is the small opening in the center of your lips through which the air will pass. It should be a small, oval-shaped hole. You are not pursing your lips as if to whistle, but rather creating a seal with firm corners and a relaxed center.
This formation might feel unnatural at first. Use a mirror to check your work. Are your cheeks puffed? Is your chin bunched up? Are your lips pulled back in a tight smile? These are common issues to avoid. The goal is a relaxed, natural-feeling facial posture that can be sustained without strain.
| Characteristic | Correct Embouchure (Do) | Incorrect Embouchure (Don't) |
|---|---|---|
| Lip Position | Lips together, centered on the mouthpiece. | Lips stretched thin or rolled too far in/out. |
| Corners of Mouth | Firm and anchored, pointing slightly down or straight. | Pulled back into a tight smile or too loose. |
| Cheeks | Remain flat against the teeth. | Puffed out with air. |
| Chin | Flat and pointed down. | Bunched up or "crumpled." |
| Jaw | Slightly lowered and forward, relaxed. | Clenched shut or pulled back. |
| Airstream | Focused, steady, and fast. | Weak, unfocused, or inconsistent. |
The "Buzz": Creating Sound with the Mouthpiece
Before you even bring the full instrument into the equation, you must learn to create the fundamental vibration—the buzz. This is done with the mouthpiece alone. This exercise isolates the role of your embouchure and breath, allowing you to focus on the core of sound production.
- Form Your Embouchure: Follow the steps outlined above. Say "m," firm the corners, and set your jaw.
- Bring the Mouthpiece to Your Lips: Place the mouthpiece on your lips. A common starting point is to have roughly half of the mouthpiece on the upper lip and half on the lower lip, but you should find what feels most comfortable and centered for you. The rim should feel like it is creating a comfortable seal.
- Take a Deep Breath: Use the diaphragmatic breathing technique. Fill your lungs with air, feeling your abdomen expand.
- Buzz: Push a steady, fast stream of air through the aperture in your lips. The goal is to make your lips vibrate together inside the mouthpiece cup, creating a buzzing sound. It might sound like a trapped bee.
Do not worry about the pitch of the buzz at first. Just focus on creating a consistent, steady sound. Is the buzz clear, or is it airy and weak? If it is airy, your aperture might be too large, or your airstream might not be fast enough. If you cannot get a buzz at all, your lips might be too tense. Remember to keep the center of your lips soft and fleshy.
Practice buzzing on the mouthpiece for several minutes each day. Try to change the pitch of the buzz. To make the pitch go higher, you will need to make the air stream faster and firm your embouchure slightly (without tightening the corners or creating tension). To make the pitch go lower, relax the embouchure and use a slower, warmer airstream. This skill of changing the pitch of your buzz is directly transferable to playing different notes on the horn itself. This simple, foundational practice is one of the most important elements of learning how to play a baritone horn effectively.
Step 3: Producing Your First Notes
With a foundational understanding of breath support and embouchure, we arrive at the exhilarating moment of bringing the instrument to life. This step involves translating the buzz you cultivated on the mouthpiece into a musical note amplified by the horn. It is a process that weds the physical actions of the player with the acoustic properties of the instrument. Here, we introduce the role of the valves and begin to explore how different notes are formed. The initial goal is not complexity, but clarity and stability. Producing a single, beautiful, sustained note is a greater achievement than stumbling through a dozen sloppy ones. This is where patience and focused listening become your most valuable tools.
Understanding the Valve System
Think of the baritone horn, in its natural state with no valves pressed, as being one specific length. This length allows it to play a particular series of notes, known as the overtone series. To play notes outside of this series, we need to change the fundamental length of the instrument. This is the function of the valves.
Each of the three valves is connected to a loop of tubing. When you press a valve, you are essentially a switch operator, rerouting the air to travel through that extra length of tubing before it reaches the bell. This makes the total length of the horn longer, which in turn lowers the pitch of the note produced.
- The Second Valve: This valve is connected to the shortest loop of tubing. Pressing it lowers the pitch by one half-step.
- The First Valve: This valve is connected to a medium-length loop. Pressing it lowers the pitch by two half-steps (or one whole step).
- The Third Valve: This valve is connected to the longest loop. Pressing it lowers the pitch by three half-steps (or a minor third).
These valves can also be used in combination. For example, pressing the first and second valves together lowers the pitch by three half-steps (1 whole step + 1 half step). This system of seven possible combinations (open, 2, 1, 1-2, 3, 2-3, 1-3, and 1-2-3) allows the player to access every note in the chromatic scale. Understanding this logic is a key part of learning how to play a baritone horn.
Your First Note: The Open Valve Position
The most logical place to start is with no valves depressed, known as the "open" position. The specific note you will produce depends on the key of your instrument (most are in B-flat) and the pitch of your buzz. Let us aim for one of the most stable notes in this open series: Concert B-flat (written as C for the baritone horn).
- Assemble and Hold the Horn: Ensure you are sitting or standing with good posture, holding the instrument correctly.
- Form Your Embouchure: Prepare your embouchure just as you did for the mouthpiece-only buzzing exercise.
- Bring the Horn to Your Lips: Remember, bring the instrument to you, not your head to the instrument. Place the mouthpiece comfortably on your embouchure.
- Take a Deep, Relaxed Breath: Fill up from the bottom of your lungs.
- Buzz into the Horn: With no valves pressed, release a steady, confident stream of air to start your lips buzzing.
What do you hear? You might get one of several notes from the open overtone series. You might get a low note, a middle note, or even a high, squeaky one. This is normal. Your goal is to aim for a comfortable note in your middle range. It should feel stable and easy to produce. This note is likely the B-flat below middle C (written as a C in the bass clef for baritone).
Hold this note for as long as you can with a steady, beautiful sound. Do not let it waver in pitch or volume. Listen intently. Is the sound clear or fuzzy? Is it steady or shaky? The quality of this single note is your first benchmark for progress. Repeat this process several times, focusing entirely on producing the most beautiful, stable, single tone you can. This is an exercise called "long tones," and it is something even professional musicians do every single day.
Introducing Valve Combinations
Once you can reliably produce a steady open note, it is time to involve the valves. The key is to make the transition from one note to another as smooth as possible. We will start by descending chromatically (by half-steps) from our open note.
Let's assume your open note was a written C.
- To play a B (a half-step lower): Press the second valve.
- To play a B-flat (a whole step lower): Press the first valve.
- To play an A (three half-steps lower): Press the first and second valves together.
Try this exercise:
- Play your open C and hold it for four counts.
- While still blowing, cleanly press down the second valve to play the B. Hold it for four counts.
- Continue this pattern, moving down the chromatic scale using the standard valve combinations.
Focus on two things: the action of your fingers and the consistency of your air. Your fingers should press the valves down quickly and decisively, not tentatively. Your airstream must remain constant and supported as you change notes. Do not let the air "dip" or stop between notes. Imagine the air as a continuous river of sound, and the valves are simply changing its course.
Navigating the Overtone Series
Now for a slightly more advanced concept that is central to brass playing. For any single valve combination (including open), you can play multiple notes simply by changing your embouchure and the speed of your air. This is the overtone series.
Try this experiment:
- Play your comfortable open note (let's call it C).
- Without changing your fingering (keep the valves open), firm your embouchure slightly and use a faster, more focused airstream. Think of the syllable "tee" instead of "too."
- You should "jump" up to a higher note. This next note in the open series is a G (a perfect fifth higher).
- From that G, you can tighten a bit more and speed up the air again to jump to the next C, an octave above where you started.
Every valve combination has its own overtone series. A skilled player navigates both the horizontal axis (changing notes with valves) and the vertical axis (changing notes within an overtone series with their embouchure). This is why you can play a full range of music with only three valves. This interplay between the instrument's mechanics and the player's physiology is the essence of what it means to play a brass instrument. Understanding this concept early on will dramatically accelerate your progress in learning how to play a baritone horn.
| Note (Written for B-flat Baritone) | Valve Combination |
|---|---|
| C | 0 (Open) |
| D | 1 and 3 (or just 3, often for tuning) |
| E | 1 and 2 |
| F | 1 |
| G | 0 (Open – higher overtone) |
| A | 1 and 2 (higher overtone) |
| B | 2 (higher overtone) |
| C (one octave up) | 0 (Open – even higher overtone) |
| This table shows the fingerings for a C major scale. Notice how some notes use the same fingering (like C and G) but are differentiated by the player's embouchure and airstream. |
Step 4: Developing Technique and Dexterity
Having established the ability to produce a basic sound and navigate between a few notes, the next stage of our journey involves developing the fluency and precision necessary to play actual music. This is the domain of "technique." Technique is not an end in itself; it is the means by which we translate musical ideas into sound. It encompasses the ability to read the language of music, the physical coordination to play notes accurately and quickly, and the control to shape sounds with intention. This phase can feel like disciplined work, akin to an athlete drilling fundamentals. However, every scale mastered and every articulation clarified is a new word added to your musical vocabulary, expanding your capacity for expression.
The Language of Music: Reading Basic Notation
While it is possible to learn to play by ear, a fundamental understanding of written music opens up a vast universe of repertoire and facilitates communication with other musicians. Music notation is a wonderfully intuitive system that tells a player two primary things: what note to play (pitch) and when to play it (rhythm).
- The Staff: Music for the baritone horn is typically written on a staff of five lines and four spaces, using the bass clef. The symbol for the bass clef looks a bit like a curvy "F," and its two dots surround the line on which the note F (below middle C) sits. Each line and space on the staff corresponds to a specific note.
- Notes: The notes are named after the first seven letters of the alphabet (A, B, C, D, E, F, G). Their position on the staff tells you their pitch. For example, in the bass clef, the notes in the spaces are A, C, E, G (a helpful mnemonic is "All Cows Eat Grass"). The notes on the lines are G, B, D, F, A ("Good Boys Do Fine Always").
- Rhythm: The shape of a note tells you how long to hold it. A whole note (an open oval) typically lasts for four counts. A half note (an oval with a stem) lasts for two counts. A quarter note (a filled-in oval with a stem) lasts for one count. These values are relative and are organized within measures, which are divided by bar lines.
Start by getting a beginner method book for the baritone horn. These books are expertly designed to introduce concepts incrementally. The first few pages will likely have exercises that involve playing just one or two different notes with simple rhythms. As you play these exercises, say the name of the note and count the rhythm out loud. This multi-sensory approach—seeing the note, saying its name, playing the sound, and feeling the rhythm—is a powerful way to build the connection between the written symbol and the musical gesture.
Освоение гамм и арпеджио
If notes are letters and rhythms are grammar, then scales and arpeggios are the fundamental sentence structures of music. A scale is a series of notes played in ascending or descending order, following a specific pattern of whole steps and half steps. An arpeggio is created by playing the notes of a chord one at a time. Practicing them might not feel as gratifying as playing a melody, but they are the single most effective way to develop technical proficiency.
Why are they so important?
- Finger Dexterity: Playing scales forces you to execute every possible valve combination in a logical sequence, building muscle memory and coordination in your right hand.
- Mental Mapping: They teach you the "geography" of your instrument. As you play a C major scale, you internalize the fingerings and embouchure adjustments needed to move from C to D, D to E, and so on.
- Ear Training: Playing scales and listening intently trains your ear to recognize the sound and feel of correct intervals.
- Musical Foundation: The vast majority of Western music is built from the notes of scales and arpeggios. By mastering them, you are pre-learning the building blocks of the songs you will eventually play (BBTrumpet, 2025).
Begin with the C major scale, as shown in the table in the previous section. Play it slowly at first. In fact, impossibly slowly. Focus on producing a perfectly even, beautiful tone on every single note. The goal is not speed; the goal is perfection at a slow tempo. As you become more comfortable, you can gradually increase the speed. Then, move on to other simple scales like F major and G major. A consistent, daily regimen of scale practice is a non-negotiable part of learning how to play a baritone horn seriously.
Articulation: Tonguing Techniques (Legato vs. Staccato)
So far, we have focused on connecting notes smoothly. But music requires different ways of starting and shaping notes. This is called articulation. The primary tool for articulation on a brass instrument is the tongue. Your tongue acts like a valve, releasing the air to begin a note.
- Legato (Smooth and Connected): For a smooth, connected style of playing, you use a very light tonguing motion. Think of whispering the syllable "doo" or "dah" for each note. The tongue gently touches the back of your top teeth to momentarily interrupt the air, but the airstream itself remains continuous. The goal is to move from one note to the next with no perceptible gap, like a singer moving between notes on a single vowel.
- Staccato (Short and Detached): For a short, separated style, you use a more pointed tonguing motion. Think of the syllable "tee" or "dit." The tongue makes a quicker, more defined motion, stopping the sound almost as soon as it starts. The notes are light and detached, with silence between them.
Practice your scales using different articulations. Play a scale entirely legato, focusing on the seamless connection between notes. Then, play the same scale staccato, focusing on the crispness and separation of each note. Mastering articulation gives your playing texture and character. It is the difference between speaking in a monotone and speaking with inflection and emphasis.
Building Finger Speed and Coordination
As you progress, the music you want to play will demand that your fingers move more quickly and accurately. Speed is a byproduct of precision at slow speeds. The worst thing you can do is try to play fast before you are ready. This only reinforces mistakes and builds tension.
The key is to use a metronome. A metronome is a device that provides a steady, rhythmic pulse.
- Find your "perfect" tempo: Set the metronome to a very slow speed where you can play a scale or exercise perfectly, with no mistakes in fingering, rhythm, or tone.
- Repeat, Repeat, Repeat: Play the exercise several times at this perfect tempo. Your brain and muscles are building a flawless blueprint of the passage.
- Nudge the Tempo: Increase the metronome speed by a very small increment (2-4 beats per minute). Play the exercise again. It should still feel controlled.
- Rinse and Repeat: Continue this process of small, incremental speed increases over many practice sessions.
If you start to make mistakes, you have increased the tempo too quickly. Drop it back down to a speed where you can play it perfectly again. This methodical, patient approach is the only sustainable way to build clean, reliable speed. It trains your fingers to be not just fast, but also intelligent and efficient. This disciplined practice is a challenging but necessary part of the process of how to play a baritone horn at a high level.
Step 5: Refining Your Tone and Intonation
At this point in your development, you can produce sounds, change notes, and articulate them in different ways. You are no longer just operating the instrument; you are beginning to play it. Now, we shift our focus from the "what" and "how" to the "how well." This stage is about the aesthetic quality of your music-making. It involves cultivating a sound that is not just correct, but beautiful, and ensuring that your notes are not just the right ones, but are perfectly in tune. This is a more subjective and personal phase of learning. It requires you to become a critical listener of your own playing, to develop an internal concept of an ideal sound, and to make the minute physical adjustments necessary to achieve it.
The Concept of a "Beautiful" Baritone Sound
What does a "good" baritone horn sound like? While there is room for personal variation, the consensus is that a desirable baritone tone is rich, warm, resonant, centered, and clear.
- Rich and Warm: The sound has depth and complexity, like a vintage red wine, not thin and shallow.
- Resonant: The sound seems to vibrate and fill the room, not feel small and contained.
- Centered: The note has a clear core to the sound. It is not "fuzzy," "airy," or "splattered."
- Clear: The beginning of the note (the "attack") is well-defined, not mushy or explosive.
How do you develop this? The most important thing you can do is listen. Seek out recordings of world-class euphonium and baritone horn players. Listen to artists like Steven Mead, David Childs, or Lyndon Baglin. Listen to the baritone sections in famous British-style brass bands. What do you hear? Try to describe their sound using adjectives. Internalize that sound. This becomes your target, your sonic ideal. You cannot produce a sound that you cannot first imagine. Your brain needs a clear destination before it can direct your body on how to get there. This process of deep listening is an often-overlooked aspect of learning how to play a baritone horn.
Using a Tuner: Playing in Tune
Intonation refers to the accuracy of pitch. Playing "in tune" means playing notes at their correct frequency. Playing "out of tune" can sound unpleasant and is one of the clearest markers of an amateur player. While your ear is the ultimate judge, an electronic tuner is an indispensable tool for training your ear and identifying your instrument's tendencies.
Here is how to use a tuner effectively:
- Tune Your Open Horn: Play your open middle C (or B-flat, depending on your reference) and look at the tuner. It will tell you if you are "sharp" (too high) or "flat" (too low).
- Adjust the Main Tuning Slide: If you are sharp, pull the main tuning slide out slightly to make the horn longer. If you are flat, push it in to make the horn shorter. Adjust until the tuner indicates you are perfectly in tune.
- Check Every Note: Now, play every note of a C major scale, one at a time, holding each one steady and watching the tuner. You will notice something interesting: some notes will be perfectly in tune, but others will be inherently sharp or flat. For example, the combination 1-2 is often a bit sharp, and 1-3 is often very sharp. This is a quirk of brass instrument physics.
This exercise is not about making your instrument perfect; it is about learning its imperfections. You are creating a mental map of your horn's "bad notes." A skilled player knows these tendencies and makes real-time adjustments to correct them.
Long Tones: The Secret to a Rich, Stable Sound
If there were a single "secret" to developing a beautiful, professional-quality tone, it would be the daily practice of long tones. This is the most important exercise you will ever do. It is simple, meditative, and profoundly effective.
The exercise is exactly what it sounds like: you play single notes for a long duration.
- Set a Metronome: Choose a slow tempo, like 60 beats per minute.
- Take a Full Breath: Use your best diaphragmatic breath.
- Play a Note: Start on a comfortable middle-range note, like your open C. Play the note and hold it for 4, 8, or even 16 beats.
- Focus on Quality: During that single note, your entire focus should be on the quality of the sound.
- The Beginning: Is the start of the note clean and immediate, or does it "pop" or "fuzz" into existence?
- The Middle: Is the sound absolutely steady in pitch and volume? Or does it waver? Is the tone full and resonant, or thin and weak?
- The End: Do you end the note cleanly by stopping the air, or does it trail off?
Work your way through a scale, playing each note as a long tone. This exercise builds the fine muscle control in your embouchure and teaches you to maintain consistent air support from the beginning to the end of a phrase. It is the sonic equivalent of a sculptor slowly polishing a stone, gradually revealing its inner beauty. There is no shortcut. Time spent on long tones is the best investment you can make in your sound.
Adjusting Pitch with Your Embouchure and Slides
Once your tuner has revealed which notes on your horn are out of tune, how do you fix them? You have two primary tools.
- Embouchure and Airstream: For small adjustments, you can "humor" the note into place with your embouchure. To make a note slightly flatter, relax your jaw and lips slightly, thinking of a "toh" or "aww" vowel shape inside your mouth. To make a note slightly sharper, firm your embouchure slightly (without pinching) and think of an "eee" vowel shape, which raises the position of your tongue and speeds up the air. This is a subtle skill that develops over time through careful listening.
- Slide Adjustments: For notes that are significantly out of tune (like those using the 1-3 or 1-2-3 combinations), you need to use your tuning slides. If your horn has a trigger or ring on the first or third valve slide, you can extend it with your left hand while playing to lengthen the tubing and lower the pitch. On instruments without these features, you may need to pre-adjust the third valve slide to be slightly longer before playing passages that rely heavily on it. This is a more advanced technique, but it is good to be aware of it from the beginning.
This process of actively managing intonation transforms you from a passive operator into an active, engaged musician. You are constantly listening, anticipating, and adjusting, engaged in a dynamic dance with the physics of your instrument to create a truly beautiful and harmonious sound. This deep level of engagement is what makes learning how to play a baritone horn a lifelong pursuit.
Step 6: Practice Strategies for Meaningful Progress
The ability to play a musical instrument is not a talent one is born with; it is a skill that is built, brick by brick, through consistent and intelligent practice. Simply putting in time is not enough. The quality and structure of your practice sessions are far more important than the sheer quantity of hours logged. Ineffective practice can lead to frustration, the reinforcement of bad habits, and eventual burnout. This section explores strategies for practicing smart, drawing on principles from cognitive science and music pedagogy to ensure that your effort translates into tangible, rewarding progress on your journey of learning how to play a baritone horn.
Structuring Your Practice Sessions
A well-structured practice session is like a well-balanced meal. It should have different components that address all aspects of your playing. A haphazard approach—just playing through fun songs—might be enjoyable, but it will not lead to systematic improvement. A productive 30-minute session is more valuable than two hours of aimless noodling.
Consider organizing your daily practice into these segments:
-
Warm-up (5-10 minutes): Never start playing "cold." Your muscles, both in your face and your body, need to be prepared. This phase is about gentle preparation, not strenuous work.
- Breathing Exercises: Start with a minute of deep, diaphragmatic breathing to get your air support system engaged.
- Mouthpiece Buzzing: Buzz on your mouthpiece for a few minutes, playing long tones and simple pitch bends (sirens) to activate your embouchure.
- Long Tones: Once you pick up the horn, your first sounds should be soft, gentle long tones in the comfortable middle range. This re-establishes your core sound for the day.
-
Technique (10-15 minutes): This is the "vegetables" portion of your practice. It is the fundamental work that builds your core skills.
- Scales and Arpeggios: Work on one or two specific scales for the day. Play them slowly with a metronome, focusing on perfect evenness, tone, and intonation. Use different articulations.
- Flexibility Exercises: Practice moving between different notes in the same overtone series (slurring between open C, G, and the next C, for example). This builds embouchure control.
-
Repertoire (10-15 minutes): This is the "main course." Work on the actual pieces of music you are learning.
- Isolate Difficult Spots: Do not just play the piece from beginning to end. Identify the 2-4 measures that are giving you the most trouble. Work on just those spots, slowly and deliberately, until they are secure.
- Connect the Sections: Once you have improved a difficult passage, practice playing it in context, starting a few measures before and continuing a few measures after.
-
Cool-down (2-3 minutes): Just as you warmed up, you should cool down.
- Play some very soft, low, long tones. This helps relax the embouchure muscles and can help prevent stiffness.
This structure ensures you are always reinforcing your fundamentals while also making progress on your musical goals.
The Principle of Distributed Practice
Research in cognitive science has shown that we learn and retain information more effectively when we space out our learning sessions over time. This is known as distributed practice (Mollick, 2023). Cramming for six hours on a Sunday is far less effective than practicing for 30 minutes every day.
Why does this work? Each time you return to the instrument after a break (even just 24 hours), your brain has to work slightly harder to recall the information and motor skills. This process of "effortful retrieval" strengthens the neural pathways associated with that skill, embedding it more deeply in your long-term memory. It is like building a muscle: consistent, regular workouts with periods of rest for recovery lead to growth.
The implication for a budding musician is clear: consistency is king. It is better to commit to a realistic goal of 20-30 minutes, 5-6 days a week, than to aim for an unrealistic 2 hours a day, fail, and then practice sporadically. This consistent reinforcement is a cornerstone of successfully learning how to play a baritone horn.
Setting Achievable Goals and Tracking Progress
Practice without a goal is like driving without a destination. To stay motivated, you need to have a clear idea of what you are working towards, both in the short and long term.
- Long-Term Goals: What do you want to achieve in six months? A year? Maybe it is to play a specific solo, join a community band, or simply play duets with a friend. Write this goal down.
- Short-Term Goals: Break your long-term goal into smaller, manageable steps. What do you need to achieve this week to move toward that goal? A short-term goal could be "Master the F major scale at 80 beats per minute" or "Play the first 8 bars of my piece without any note mistakes."
- Daily Goals: Each practice session should have a micro-goal. "Today, I will fix the rhythm in measure 12" is a much more effective goal than "I will practice my piece."
Tracking your progress can be incredibly motivating. Keep a practice journal. In it, you can write down:
- The date and duration of your session.
- What you worked on (e.g., "F major scale, long tones, measures 9-16 of 'Simple Gifts'").
- The metronome markings you achieved.
- A brief note about what went well and what was challenging.
Looking back at your journal after a few weeks or months can provide a powerful sense of accomplishment. You will be able to see tangible evidence of your improvement, which is a great antidote to the feeling of being stuck in a rut.
Overcoming Common Plateaus
Every musician, from the absolute beginner to the seasoned professional, hits plateaus. These are periods where it feels like you are not making any progress, despite putting in the effort. This is a normal and expected part of the learning process. The key is to have strategies to push through them.
- Change Your Routine: If you always practice the same things in the same order, your brain can go on autopilot. Shake things up. Start with repertoire instead of technique. Practice in a different room.
- Go Back to Basics: Often, a plateau is caused by a weakness in a fundamental skill. Spend a week focusing almost exclusively on the very basics: breathing, long tones, and mouthpiece buzzing. Shoring up your foundation can unlock the next level.
- Запишите себя: It is difficult to be objective while you are playing. Record a short clip of yourself and listen back. You might be surprised by what you hear. The recording will often make it obvious what needs to be fixed.
- Сделайте небольшой перерыв: Sometimes, the best thing you can do is step away for a day or two. This is not giving up; it is allowing your mind and body to rest and consolidate what you have learned. You will often come back feeling refreshed and with a new perspective.
- Seek Outside Feedback: If you are truly stuck, it might be time to play for a teacher or a more experienced player. A fresh pair of ears can often identify a problem in seconds that you have been struggling with for weeks. This external perspective is invaluable. Acknowledging that the process is challenging is a healthy part of learning (Mahoney, 2022).
Step 7: Playing Music and Finding Your Voice
After weeks and months of dedicated work on the foundational mechanics of your instrument—breathing, buzzing, fingerings, scales—we arrive at the ultimate purpose of this endeavor: making music. This final step is about synthesis. It is where you take all the technical skills you have so carefully cultivated and use them to breathe life and emotion into a piece of music. This is the transition from being a technician to being an artist. It involves looking beyond the individual notes on the page to understand the phrases, the emotional contours, and the story the music is telling. This is where you begin to develop your own unique musical voice and experience the profound joy of communication through sound.
Choosing Your First Simple Pieces
The choice of your initial repertoire is significant. The pieces should be simple enough to be achievable, preventing frustration, yet musically satisfying enough to keep you inspired. A good beginner method book is the best place to start, as it will contain pieces specifically written to reinforce the concepts you have just learned. These early pieces often consist of folk songs, simple classical melodies, or original compositions that use a limited range of notes and simple rhythms.
When you look at a new piece, do not just start playing. First, analyze it.
- Look at the Key Signature: This tells you which notes are sharp or flat throughout the piece.
- Look at the Time Signature: This tells you how many beats are in each measure and what kind of note gets one beat.
- Scan the Melody: Look for the highest and lowest notes to understand the required range.
- Clap the Rhythms: Before you even pick up the horn, clap or tap out the rhythms of any tricky passages.
- "Finger" Through the Piece: Without blowing, finger the notes of the piece while looking at the music. This helps your brain and fingers learn the sequence of movements before adding the complexity of breath and embouchure.
By doing this "pre-flight check," you solve many potential problems before they arise, making the process of learning the piece much smoother and more enjoyable.
The Role of Dynamics and Phrasing
Music written on a page is a skeleton. As the performer, your job is to add the flesh and blood that bring it to life. Two of the most important tools for this are dynamics and phrasing.
-
Dynamics: This refers to the volume of the music. You will see markings like p (piano, for soft) and f (forte, for loud). You will also see crescendos (getting gradually louder) and diminuendos (getting gradually softer). A piece played all at one volume is boring. Dynamics create interest, drama, and emotion. To play softly, you need to use a smaller volume of air but keep it fast and focused. To play loudly, you need a large, generous volume of air, fully supported by your diaphragm. Practice your long tones and scales at all dynamic levels to build this control.
-
Phrasing: This is the art of grouping notes together to form musical "sentences." Just as you would not speak a long sentence without pausing for breath, you should not play a long string of notes without musical shape. Look for natural points in the melody to "breathe." A musical phrase often has a shape—it might rise in the middle and fall at the end, like a gentle arc. Try singing a line of music first. Where do you feel the natural emphasis? Where does the line want to go? Your instrumental playing should imitate the natural rise and fall of your singing voice. This is how you make the baritone horn "sing."
Playing with Others: Ensembles and Duets
Music is, at its heart, a social art form. While solo practice is necessary, the experience of making music with other people is uniquely rewarding and educational. Joining a beginner band, a church group, or simply playing duets with a friend can accelerate your learning in several ways.
- Improved Rhythm and Timing: When you play with others, you are forced to listen and lock into a collective pulse. Your sense of rhythm will improve dramatically.
- Better Intonation: Playing with another instrument forces you to listen intently to how your pitches match up. You will learn to make micro-adjustments to your tuning in real-time to create a consonant, pleasing sound.
- Motivation and Accountability: Having a weekly rehearsal provides a powerful incentive to practice. You do not want to be the one who does not know their part.
- It's Fun: The feeling of contributing your individual part to a larger, beautiful whole is one of the great joys of being a musician.
Do not wait until you feel you are "good enough" to play with others. Find a welcoming group of fellow learners. The process of learning together is an invaluable part of the journey. For those looking for a starter instrument to join an ensemble, browsing a wide selection of духовые инструменты can be a great first step.
Exploring Different Musical Styles
The baritone horn is a wonderfully versatile instrument. While it is a cornerstone of the brass band and concert band world, its vocal and agile character allows it to fit into many other styles. Do not be afraid to explore.
- Classical: Listen to how the baritone/euphonium is used in orchestral works by composers like Gustav Holst or Percy Grainger.
- Джаз: While less common, players like Rich Matteson have shown the baritone horn can be a powerful voice in a jazz setting. Try playing some simple jazz standards.
- Folk Music: The simple, lyrical melodies of many folk traditions are beautifully suited to the baritone horn's voice.
By exploring different genres, you will learn new stylistic nuances and expand your overall musicality. You will discover new ways to use articulation, phrasing, and tone color. This exploration is part of finding your own personal voice on the instrument. The ultimate goal of learning how to play a baritone horn is not just to replicate what is on the page, but to use the instrument as a vehicle for your own unique emotional and artistic expression.
Часто задаваемые вопросы (FAQ)
How long does it take to learn the baritone horn? The timeline for learning varies greatly depending on the individual's practice consistency and goals. A dedicated beginner practicing 30 minutes a day can typically produce a decent sound and play simple melodies within a few months. Achieving proficiency to play in an intermediate-level ensemble might take 2-3 years. Mastery, like with any instrument, is a lifelong pursuit.
Is the baritone horn difficult to play? The baritone horn is often considered one of the more accessible brass instruments for beginners. The embouchure is generally easier to form than on a French horn or trumpet, and the initial tone production is quite rewarding. The main challenges are developing the breath support needed for a large instrument and mastering intonation.
What is the main difference between a baritone horn and a euphonium? The primary difference is the bore profile. A true baritone has a more cylindrical bore, giving it a brighter, lighter tone. A euphonium has a conical bore that widens throughout its length, resulting in a darker, warmer, and broader sound. While fingerings are the same, they are technically different instruments with distinct timbres.
How do I clean my baritone horn? Daily care involves wiping it down and emptying water keys. Weekly, you should clean the mouthpiece with a brush. Monthly, it is wise to give it a "bath" in lukewarm, soapy water, using flexible "snake" brushes to clean the inside of the tubing and slides. Always re-apply valve oil and slide grease after a full cleaning.
Can I teach myself to play the baritone horn? It is possible to teach yourself the basics using method books and online resources. However, progress is usually much faster and more effective with guidance from a qualified teacher. A teacher can provide real-time feedback on your embouchure, posture, and sound, correcting bad habits before they become ingrained.
What are some common mistakes beginners make? Common mistakes include using shallow chest breathing instead of deep diaphragmatic breathing, puffing the cheeks, applying too much mouthpiece pressure, having a tense posture, and practicing too fast too soon, which reinforces errors. Focusing on fundamentals and patient, slow practice is the best way to avoid these pitfalls.
Заключение
The path to learning how to play a baritone horn is a structured journey that begins with a physical understanding of the instrument and culminates in the art of personal expression. It is a process that engages the body, the intellect, and the emotions. From the foundational act of taking a deep, supported breath to the nuanced shaping of a musical phrase, each step builds logically upon the last. The discipline of daily practice, the intellectual challenge of reading music, and the aesthetic pursuit of a beautiful tone combine to create a deeply rewarding experience. The baritone horn, with its warm and vocal character, is more than just a collection of brass tubing; it is a partner in communication. By mastering its mechanics, you gain a new voice with which to participate in the timeless human conversation of music. The skills developed—patience, discipline, critical listening, and creative expression—extend far beyond the realm of music, enriching the individual in profound ways.
Ссылки
Mahoney, A. J. (2022, October 24). An overlooked superpower: How to explain complex concepts. Medium. Retrieved from @a.jeremymah/an-overlooked-superpower-how-to-explain-complex-concepts-2dd14573ac13
Mollick, E. (2023, March 17). Using AI to make teaching easier & more impactful. One Useful Thing. Retrieved from https://www.oneusefulthing.org/p/using-ai-to-make-teaching-easier
The IRIS Center. (2025). Page 3: UDL principles. Vanderbilt University. Retrieved from https://iris.peabody.vanderbilt.edu/module/udl/cresource/q1/p03/
University of Arkansas. (2022, July 26). Using Bloom's Taxonomy to write effective learning objectives. TIPS. Retrieved from https://tips.uark.edu/using-blooms-taxonomy/
University of Illinois Chicago. (2023, January 25). Bloom's Taxonomy of educational objectives. Center for the Advancement of Teaching Excellence. Retrieved from https://teaching.uic.edu/cate-teaching-guides/syllabus-course-design/blooms-taxonomy-of-educational-objectives/
User, U. (2025, April 28). How to play the trumpet? – Beginner to expert. BBTrumpet. Retrieved from https://www.bbtrumpet.com/how-to-play-the-trumpet/