


Streszczenie
Ta eksploracja zapewnia kompleksowe badanie wieloaspektowej dyscypliny gry na flecie, odnosząc się do skomplikowanej syntezy mechaniki fizycznej, zrozumienia poznawczego i wrażliwości artystycznej wymaganej do osiągnięcia mistrzostwa. Wykracza poza powierzchowne traktowanie techniki, aby zbadać podstawowe zasady produkcji tonów, ergonomicznej postawy i ekspresji artykulacyjnej. Dyskusja zagłębia się w fizjologiczne podłoże kontroli oddechu i kształtowania wklęsłości, przedstawiając je nie jako zwykłe działania, ale jako kultywowane umiejętności zakorzenione w świadomości ciała. Ponadto analizuje ustrukturyzowane metodologie rozwijania płynności technicznej, takie jak ćwiczenie skal i arpeggio, umieszczając je w szerszym kontekście umiejętności muzycznych. Rozważane są również psychologiczne wymiary występu, w tym zarządzanie lękiem i kultywowanie osobistego głosu muzycznego. Łącząc praktyczne wskazówki z badaniem estetycznego i ekspresyjnego potencjału instrumentu, tekst ten służy jako dogłębne źródło informacji dla aspirujących i rozwijających się flecistów, mające na celu wspieranie głębokiej i trwałej relacji z ich rzemiosłem.
Kluczowe wnioski
- Rozwijaj stabilny, elastyczny chwyt, aby uzyskać czysty, rezonansowy ton.
- Prawidłowa postawa i ułożenie dłoni zapobiegają przeciążeniom i umożliwiają płynną technikę.
- Konsekwentne ćwiczenie skal i etiud ma fundamentalne znaczenie dla opanowania techniki.
- Opanowanie kontroli oddechu jest siłą napędową ekspresyjnej gry na flecie.
- Właściwa pielęgnacja instrumentu zapewnia długowieczność i optymalną wydajność fletu.
- Wibrato, gdy jest prawidłowo rozwinięte, dodaje muzyce ciepła i emocjonalnej głębi.
- Muzykalność wykracza poza nuty, łącząc wyrafinowaną technikę z autentycznymi emocjami.
Spis treści
- 1. Podstawa tonu: Opanowanie Embouchure i oddechu
- 2. Architektura muzyki: Postawa, pozycja dłoni i palcowanie
- 3. Język ekspresji: Artykulacja i dynamika
- 4. Droga do płynności: Skale, arpeggia i schematy ćwiczeń
- 5. Dusza instrumentu: Vibrato i zaawansowane techniki ekspresyjne
- 6. Instrument jako partner: Wybór, pielęgnacja i zrozumienie fletu
- 7. Sposób myślenia wykonawcy: Przezwyciężanie tremy i kultywowanie muzykalności
- Często zadawane pytania
- Wnioski
- Referencje
1. Podstawa tonu: Opanowanie Embouchure i oddechu
Początkowy dźwięk wytwarzany przez flecistę jest najbardziej definiującym elementem jego muzycznej tożsamości. Zanim pojedyncza nuta zostanie ukształtowana przez palce, zanim melodia nabierze rozpędu, istnieje surowy materiał tonu, zrodzony z intymnej współpracy oddechu i ciała. Proces ten, daleki od prostego dmuchania w otwór, jest wyrafinowaną dyscypliną fizjologiczną. Jest to akt kształtowania powietrza, nadawania mu kierunku, skupienia i witalności. Zaniedbanie tego fundamentu to budowanie muzycznego domu na piasku. Piękny ton nie jest dziełem przypadku; jest to celowy rezultat zrozumienia i opanowania mechaniki ludzkiego ciała jako komory rezonansowej i reżysera kolumny powietrza. Podróż do gry na flecie zaczyna się tutaj, w cichej, skoncentrowanej przestrzeni między płucami a płytką wargową.
Fizyka i fizjologia wspomagania oddechu
Mówienie o wspomaganiu oddechu to mówienie o silniku, który napędza całe muzyczne przedsięwzięcie. Wielu początkujących błędnie uważa, że gra na flecie wymaga silnego wydechu z klatki piersiowej i ramion. Takie podejście jest nie tylko nieefektywne, ale także wprowadza napięcie, które jest przeciwne dobrej produkcji tonów. Prawdziwe źródło mocy znajduje się głębiej, w przeponie i otaczających ją mięśniach brzucha i międzyżebrowych. Wyobraź sobie tułów jako miech. Płytki, napędzany klatką piersiową oddech jest jak używanie tylko górnej części miecha - wytwarza słaby i niestabilny strumień powietrza. Z kolei oddech przeponowy angażuje pełną pojemność płuc, wciągając powietrze głęboko do ciała i umożliwiając kontrolowane, trwałe i mocne wydychanie.
Proces ten rozpoczyna się od wdechu. Prawidłowy oddech jest zrelaksowany i cichy, rozszerzając brzuch na zewnątrz, gdy przepona kurczy się i obniża, tworząc podciśnienie, które wciąga powietrze do płuc. Ramiona i klatka piersiowa powinny pozostać względnie nieruchome i rozluźnione. Jest to przeciwieństwo napiętego, sapiącego oddechu, który wielu osobom kojarzy się z wysiłkiem. Podczas wydechu mięśnie brzucha angażują się - nie z nagłym zaciśnięciem, ale ze stałym, wspierającym naciskiem. To kontrolowane zaangażowanie popycha przeponę w górę, wypychając powietrze w spójnej, skoncentrowanej kolumnie. To jest esencja "wsparcia". Nie jest to brutalna siła, ale kontrolowane uwalnianie energii. Flecista musi kultywować głęboką świadomość tych głębokich mięśni, trenując je, aby zapewnić stabilną platformę powietrza, na której ton może spoczywać, niezachwiany i bezpieczny. Ta stabilność pozwala na długie frazy, spójną wysokość dźwięku i bogate, pełne brzmienie we wszystkich rejestrach instrumentu. Jest to niewidzialna architektura wspierająca każdą nutę.
Rzeźbienie powietrza: Niuanse Embouchure
Jeśli wspomaganie oddechu jest silnikiem, to embouchure jest dyszą, która kształtuje i kieruje energią. Termin "embouchure" odnosi się do specyficznego ukształtowania mięśni twarzy, warg i szczęki używanych do wydobywania dźwięku na instrumencie dętym. W przypadku fletu jest to szczególnie delikatna sprawa. Wargi flecisty nie naciskają na stroik, ale tworzą jedną połowę mechanizmu wytwarzającego dźwięk, z krawędzią płytki wargowej tworzącą drugą. Sam strumień powietrza staje się elementem wibrującym, rozszczepiając się o tę krawędź. Jakość tego strumienia powietrza, jego rozmiar, kształt i prędkość, jest całkowicie określona przez chwyt i dyktuje wynikową barwę dźwięku, wysokość i szybkość reakcji.
Powszechnym punktem wyjścia jest myślenie o słowie "kupa" lub "czysty". Wargi powinny być zbliżone do siebie w zrelaksowany, naturalny sposób, nie powinny być rozciągnięte w ciasny, sztuczny uśmiech ani nadmiernie ściągnięte. Otwór między wargami, znany jako apertura, powinien być mały i eliptyczny. To właśnie przez ten starannie ukształtowany otwór przemieszcza się skupiony strumień powietrza. Celem jest stworzenie kolumny powietrza, która jest skupiona jak laser, a nie rozproszona, oddychająca chmura. Dolna warga powinna być miękka i mięsista, stanowiąc poduszkę dla płytki wargowej. Powinna ona lekko zwijać się nad krawędzią otworu embouchure, pokrywając około jednej czwartej do jednej trzeciej otworu.
Elastyczność jest najważniejsza. Sztywny, statyczny chwyt może generować tylko jeden rodzaj dźwięku. Prawdziwie mistrzowski flecista posiada dynamiczny chwyt, który stale się dostosowuje. Aby grać w niskim rejestrze, szczęka rozluźnia się i lekko opada, tworząc większą przestrzeń rezonansową w jamie ustnej (tak jakby tworzyła samogłoskę "oh"). Strumień powietrza staje się wolniejszy i szerszy, skierowany bardziej w dół do otworu embouchure. Aby wznieść się do wysokiego rejestru, kąciki ust lekko się unoszą (nie jest to uśmiech, ale skupione napięcie), szczęka wysuwa się do przodu, a strumień powietrza staje się szybszy, węższy i skierowany bardziej w poprzek otworu. Ta ciągła, subtelna regulacja jest kluczem do poruszania się w pełnym zakresie instrumentu z równym, pięknym tonem. To taniec milimetrów, rozmowa między mięśniami i metalem.
Rozwiązywanie typowych problemów tonalnych
Droga do dobrego brzmienia jest często usłana frustrującymi przeszkodami. "Oddychający" lub "zwiewny" dźwięk jest prawdopodobnie najczęstszą skargą wśród początkujących. Prawie zawsze jest to problem z ostrością. Albo przysłona jest zbyt duża i rozproszona, albo strumień powietrza nie jest prawidłowo skierowany na krawędź płyty wargowej. Przydatnym ćwiczeniem umysłowym jest wyobrażenie sobie kierowania strumienia powietrza na przeciwległą wewnętrzną ścianę główki fletu. Ćwiczenie z samą główką, w celu uzyskania czystego, dzwoniącego dźwięku, może pomóc w wyizolowaniu i rozwiązaniu tego problemu. Należy również sprawdzić podwinięcie dolnej wargi; podwinięcie jej zbyt daleko do fletu stłumi dźwięk, podczas gdy niewystarczające podwinięcie spowoduje, że powietrze przeleje się przez górną wargę.
Innym częstym problemem jest cienki, ściśnięty lub ostry ton, szczególnie w górnym rejestrze. Często wynika to z nadmiernego napięcia. Kiedy gracz napina wargi, ściska szczękę i wymusza powietrze, powstały dźwięk jest zwężony i nieprzyjemny. Rozwiązaniem jest powrót do zasady wspomagania oddechu. Siła powinna pochodzić z brzucha, a nie z twarzy. Embouchure musi pozostać zrelaksowany, ale skoncentrowany. Wysokie dźwięki powinny być odczuwane jako unoszące się na potężnej, głębokiej kolumnie powietrza, a nie wyciskane przez zaciśnięte gardło. Ćwiczenie długich dźwięków, zaczynając od wygodnego środkowego rejestru i powoli rozszerzając w górę i w dół bez zmiany podstawowej jakości dźwięku, jest niezbędnym ćwiczeniem do diagnozowania i korygowania tych problemów. Buduje ono pamięć mięśniową wymaganą do uzyskania niezmiennie pięknego tonu, prawdziwego głosu flecisty.
2. Architektura muzyki: Postawa, pozycja dłoni i palcowanie
Relacja między muzykiem a jego instrumentem jest głęboko fizyczna. W przypadku flecistów relacja ta jest szczególnie asymetryczna i wymaga zaawansowanego zrozumienia równowagi i ergonomii, aby uniknąć chronicznego dyskomfortu i umożliwić swobodę techniczną. Sposób, w jaki flecista stoi lub siedzi, sposób, w jaki trzyma instrument i efektywność ruchów palców stanowią fizyczną architekturę, na której budowana jest cała muzyczna ekspresja. Zła architektura prowadzi do niestabilności, napięcia i ostatecznego upadku w postaci kontuzji lub ograniczeń technicznych. Dobra architektura, odwrotnie, tworzy stan dynamicznej równowagi, w którym ciało jest wolne od napięć, a palce są przygotowane do poruszania się z gracją i precyzją. Nie chodzi tu o przyjęcie sztywnej, wojskowej postawy, ale o znalezienie stanu zrelaksowanego, czujnego ustawienia, które pozwala ciału stać się niezakłóconym przewodnikiem muzyki.
Ciało jako ostateczny system wsparcia
Zanim jeszcze flet zostanie podniesiony, fundament musi zostać położony na ciele gracza. Zarówno w pozycji stojącej, jak i siedzącej, zasady dobrej postawy są takie same. Kręgosłup powinien być wydłużony, a nie sztywny, z zachowaniem jego naturalnych krzywizn. Wyobraź sobie sznurek delikatnie ciągnący czubek głowy w kierunku sufitu, tworząc przestrzeń między kręgami. Ramiona powinny być rozluźnione i opuszczone, a nie zgarbione wokół uszu - co jest częstą reakcją na niepokój lub wysiłek fizyczny. Stopy powinny być mocno osadzone na ziemi, mniej więcej na szerokość barków, zapewniając stabilną podstawę. Jeśli siedzisz, powinieneś siedzieć przodem do krzesła, z wyprostowanymi plecami i nie opierać się o oparcie krzesła. Taka postawa zapewnia, że tułów pozostaje swobodny, aby działać jak miech rezonansowy opisany w poprzedniej sekcji.
Technika Alexandra, metoda poprawiająca łatwość i swobodę ruchów, oferuje głęboki wgląd dla flecistów. Uczy świadomości relacji między głową, szyją i plecami. Każde napięcie w szyi będzie promieniować w dół, ograniczając barki, ramiona, a nawet oddech. Ucząc się uwalniać to pierwotne napięcie, całe ciało może osiągnąć stan większego opanowania i wydajności. Gra na flecie nie powinna być aktem zmagania się z instrumentem; powinna być przedłużeniem zrównoważonego, wyrównanego ciała. Takie holistyczne podejście zapobiega powszechnym bólom pleców, ramion i szyi, które nękają tak wielu muzyków i pozwala na dłuższe, bardziej produktywne sesje treningowe.
Znajdowanie równowagi: Pozycja dłoni i punkty styku
Nowoczesny flet Boehm jest cudem inżynierii, ale nie jest z natury ergonomiczny. Trzymanie go wymaga przeciwdziałania siłom obrotowym bez konieczności mocnego chwytania. Istnieją trzy główne punkty styku, które tworzą stabilny system dźwigni. Po pierwsze, podstawa lewego palca wskazującego delikatnie naciska na korpus fletu, zapewniając kotwicę pchającą do przodu. Po drugie, prawy kciuk, umieszczony mniej więcej pod prawym palcem wskazującym lub środkowym, naciska w górę i lekko do przodu, zapobiegając staczaniu się fletu do tyłu. Kciuk powinien być prosty lub lekko zakrzywiony, a nie wygięty pod ostrym kątem, co powoduje napięcie. Trzecim i najważniejszym punktem równowagi jest podbródek/dolna warga gracza na płytce wargowej. Ten punkt zapewnia nacisk w dół, który stabilizuje cały system.
Gdy te trzy punkty są w równowadze, palce są uwolnione. Nie powinny być one używane do chwytania lub podtrzymywania ciężaru instrumentu. Ich jedynym zadaniem jest naciskanie klawiszy. Dłonie powinny być zakrzywione naturalnie, jakby trzymały małą piłkę. Palce również powinny być zakrzywione, z mięsistymi opuszkami spoczywającymi lekko na środku klawiszy. Częstym błędem jest granie płaskimi, prostymi palcami, co jest powolne, hałaśliwe i nieefektywne. Innym błędem jest unoszenie palców zbyt wysoko nad klawisze, co marnuje ruch i czas. Celem jest ekonomia ruchu, w której palce poruszają się tylko tyle, ile jest konieczne do otwierania i zamykania klawiszy, pozostając przez cały czas blisko pozycji wyjściowej. Ta zrelaksowana, wydajna pozycja dłoni jest bramą do technicznej szybkości i przejrzystości. Rozwijanie jej wymaga cierpliwej, uważnej praktyki, ciągłego sprawdzania i uwalniania wszelkich oznak "uścisku śmierci".
| Wspólny błąd | Opis problemu | Konsekwencje fizyczne | Działania naprawcze |
|---|---|---|---|
| Przygarbiona postawa | Zaokrąglenie górnej części pleców i ramion, zapadnięcie klatki piersiowej. | Ogranicza pojemność płuc, utrudnia oddychanie, powoduje ból pleców i szyi. | Usiądź lub stań wysoko, wyobrażając sobie sznurek ciągnący głowę do góry. Wydłuż kręgosłup i otwórz klatkę piersiową. |
| Przygarbione ramiona | Uniesienie ramion w kierunku uszu, powodujące napięcie szyi i górnej części pleców. | Powoduje ból szyi/ramion, utrudnia oddychanie i ogranicza ruchy ramion. | Świadomie rozluźnij i opuść ramiona. Wykonuj rolowanie ramion przed i w trakcie treningu. |
| "Death Grip" | Używanie palców do mocnego trzymania fletu zamiast wyważania go. | Napięcie w dłoniach i przedramionach, powolne i niezdarne palcowanie, możliwość wystąpienia urazów związanych z powtarzającym się wysiłkiem. | Skup się na trzech punktach równowagi (lewy palec wskazujący, prawy kciuk, podbródek). Palce powinny lekko spoczywać na klawiszach. |
| Zgięty prawy nadgarstek | Trzymanie prawego nadgarstka pod ostrym, nienaturalnym kątem w celu dosięgnięcia klawiszy. | Może prowadzić do zapalenia ścięgien lub zespołu cieśni nadgarstka. Ogranicza ruchomość palców. | Prawy nadgarstek powinien być maksymalnie wyprostowany. Dostosuj pozycję stawu stopy, aby ustawić klawisze w bardziej naturalnym położeniu. |
| Wysokie "latające" palce | Podnoszenie palców z dala od klawiszy po ich naciśnięciu. | Nieefektywny ruch, wolniejsze fragmenty, hałaśliwa akcja klawiszy, brak precyzji. | Ćwicz powolne gamy przed lustrem, świadomie trzymając palce blisko klawiszy przez cały czas. |
Logika palcowania
System palcowania Boehm'a jest niezwykle logiczny, ale zawiera idiosynkrazje, które należy opanować. Podstawową zasadą jest to, że odsłanianie otworów skraca kolumnę powietrza, tworząc wyższą wysokość dźwięku. Jednak akustyka fletu wymaga systemu odpowietrzania i krzyżowania, aby niektóre nuty brzmiały wyraźnie i zgodnie z melodią. Flecista nie uczy się po prostu poszczególnych palcowań; uczy się wzorców palcowania i ścieżek. Na przykład przejście z C do D wymaga uniesienia sześciu palców i wciśnięcia jednego - złożony manewr, który musi stać się drugą naturą. Ćwiczenie skal i arpeggiów, jak omówimy później, jest podstawową metodą programowania tych ścieżek w układzie nerwowo-mięśniowym.
Poza podstawowymi palcowaniami, istnieje szeroki wachlarz palcowań alternatywnych i trylowych. Palcowania alternatywne są używane w celu ułatwienia trudnych pasaży lub dostosowania intonacji. Na przykład dźwięk B może być palcowany prawym palcem wskazującym lub kciukiem; wybór zależy wyłącznie od kontekstu muzycznego i tego, która opcja zapewnia płynniejsze przejście. Palcowania trylowe są wyspecjalizowanymi kombinacjami zaprojektowanymi do tworzenia szybkich przemian między dwoma nutami, które w przeciwnym razie byłyby niezgrabne. Kompleksowa tabela palcowania jest niezbędnym narzędziem, ale jest tylko punktem wyjścia. Prawdziwe mistrzostwo w palcowaniu pochodzi z doświadczenia, z napotkania trudnego fragmentu i wykorzystania swojej wiedzy o instrumencie w celu znalezienia najbardziej eleganckiego i skutecznego rozwiązania. Takie podejście do rozwiązywania problemów przekształca flecistę ze zwykłego operatora instrumentu w prawdziwego technika, który rozumie jego wewnętrzne funkcjonowanie.
3. Język ekspresji: Artykulacja i dynamika
Gdy flecista jest w stanie wytworzyć spójny ton i poruszać się po instrumencie z fizyczną łatwością, kolejną wielką granicą jest ekspresja muzyczna. Występ składający się z perfekcyjnie zagranych nut o pięknym brzmieniu, ale bez zmian w ataku lub głośności, jest muzycznie obojętny. To jak monolog wygłoszony bezbłędnym, ale robotycznym monotonem. Artykulacja i dynamika to elementy, które tchną życie w nuty, nadając im kształt, znaczenie i emocjonalny rezonans. Są to interpunkcja, fleksja i prozodia języka muzycznego. Artykulacja definiuje początek i koniec nuty, określając, czy jest ona ostra i wyraźna, czy miękka i połączona. Dynamika odnosi się do względnej głośności lub miękkości muzyki, tworząc kontury intensywności i zwolnienia. Opanowanie tych narzędzi pozwala fleciście wyjść poza zwykłą grę na flecie i zacząć komunikować się za jego pośrednictwem.
Rola języka: Interpunkcja w muzyce
W grze na flecie język jest głównym czynnikiem artykulacji. Działa jak zawór, chwilowo przerywając strumień powietrza, aby stworzyć czyste, precyzyjne początki nut. Najbardziej podstawową formą artykulacji jest pojedynczy język. Flecista dotyka czubkiem języka podniebienia twardego, tuż za górnymi zębami (wyrostek zębodołowy), tak jakby przygotowywał się do wypowiedzenia sylaby "too" lub "doo". Gdy wspomaganie oddechu się włącza, język gwałtownie się uwalnia, pozwalając sprężonemu strumieniowi powietrza uderzyć w płytkę wargową. Wybór spółgłoski wpływa na charakter ataku. Sylaba "too", z bezdźwięcznym "t", daje wyraźną, czystą i często mocną artykulację, odpowiednią do przejść marcato lub staccato. Sylaba "doo", z dźwięcznym "d", wytwarza łagodniejszy, delikatniejszy atak, idealny do przejść legato, w których nuty muszą być wyraźnie zdefiniowane, ale nie ostro oddzielone.
W przypadku szybszych pasaży, pojedynczy języczek staje się fizycznie niemożliwy. Tutaj do gry wkracza podwójny i potrójny tonguing. Techniki te wykorzystują kombinację artykulacji z przodu i z tyłu języka, aby osiągnąć dużą prędkość. Podwójny tonguing wykorzystuje sylaby "too-koo" lub "doo-goo". "too" jest standardową artykulacją z przodu języka, podczas gdy "koo" jest wytwarzane przez podniesienie tylnej części języka do podniebienia miękkiego. Głównym wyzwaniem jest sprawienie, by sylaba "koo" brzmiała równie wyraźnie i mocno jak "too". Wymaga to dedykowanej praktyki, często zaczynając powoli od ćwiczeń takich jak "too-koo-too-koo" i skupiając się na równomierności dźwięku i rytmu. Triple tonguing stosuje tę samą zasadę, zazwyczaj używając wzorów takich jak "too-koo-too" lub "too-too-koo", w zależności od grupy rytmicznej. Te zaawansowane artykulacje są niezbędne dla większości wirtuozowskiego repertuaru fletowego i wymagają znacznej cierpliwości i kontroli, aby je opanować.
Spektrum ataku i uwolnienia
Artykulacja nie jest binarnym wyborem między językiem a nie-językiem. Istnieje ona w szerokim spektrum. Na jednym końcu znajduje się agresywny, perkusyjny atak sforzando, gdzie nuta zaczyna się od nagłego, mocnego akcentu. Na drugim końcu znajduje się legato slur, gdzie wiele nut jest granych w jednym oddechu bez ponownej artykulacji przez język. Palce płynnie przechodzą od jednej nuty do następnej, podczas gdy strumień powietrza pozostaje ciągły. Tworzy to płynną, połączoną linię muzyczną, instrumentalny odpowiednik strzelistej frazy wokalisty.
Pomiędzy tymi skrajnościami znajdują się nieskończone gradacje. Istnieje tenuto, w którym nuta jest utrzymywana przez całą swoją wartość, często z lekkim "pochyleniem", osiągniętym dzięki miękkiej artykulacji "doo". Jest staccato, gdzie nuty są grane krótko i oderwane, tworzone przez ostrą artykulację "toot" i natychmiastowe przerwanie nuty. Jest też mezzo-staccato lub portato, oderwana, ale niezbyt krótka artykulacja z delikatnym uniesieniem między nutami. Prawdziwie ekspresyjny flecista panuje nad całym tym spektrum, wybierając precyzyjny rodzaj ataku i zwolnienia, którego wymaga muzyka. Przypomina to wielkiego oratora, który wie, kiedy użyć ostrego, deklaratywnego stwierdzenia, a kiedy użyć miękkiego, perswazyjnego tonu. To właśnie ta zniuansowana kontrola sprawia, że występ z technicznego ćwiczenia staje się fascynującą narracją.
Malowanie dźwiękiem: Potęga dynamiki
Dynamika jest najpotężniejszym narzędziem do tworzenia konturów emocjonalnych w muzyce. Zakres od pianissimo (bardzo cicho) do fortissimo (bardzo głośno) to nie tylko kwestia głośności; to kwestia intensywności i koloru. Przejście fortissimo na flecie nie powinno być ostrym, niekontrolowanym podmuchem powietrza. Wymaga to ogromnego wsparcia oddechu z przepony, aby stworzyć dużą, szybką kolumnę powietrza, podczas gdy ucho musi pozostać elastyczne, aby poradzić sobie z ciśnieniem bez szczypania. Wynikowy dźwięk powinien być wspaniały, rezonansowy i pełny, a nie przenikliwy. I odwrotnie, przejście pianissimo jest wyczynem kontroli. Wymaga bardzo powolnego, stałego i wąskiego strumienia powietrza, nienagannie podtrzymywanego z brzucha. Emfaza musi być zrelaksowana, ale niezwykle skoncentrowana, aby utrzymać rdzeń tonu przy tak niskiej głośności. Jakiekolwiek zachwianie podparcia powietrznego spowoduje, że nuta pęknie lub całkowicie zniknie.
Poza zwykłym graniem głośno lub cicho, prawdziwa sztuka dynamiki polega na crescendo (stopniowym zwiększaniu głośności) i diminuendo (stopniowym zmniejszaniu głośności). Są to gesty, które tworzą napięcie i rozluźnienie, które wciągają słuchacza, a następnie pozwalają mu odejść. Crescendo to nie tylko wzrost głośności; to wzrost intensywności. Gdy prędkość powietrza wzrasta, flecista musi subtelnie dostosować chwyt i pozycję szczęki, aby utrzymać stabilną intonację. Diminuendo, być może nawet trudniejsze, wymaga stopniowego zmniejszania prędkości powietrza przy jednoczesnym zachowaniu skupienia i wsparcia, pozwalając nucie przejść w ciszę bez zmiany wysokości dźwięku. Zdolność do wykonania długiego, płynnego crescendo i diminuendo na pojedynczej nucie lub frazie jest znakiem rozpoznawczym dojrzałego muzyka. Demonstruje ona całkowite opanowanie połączenia między oddechem, chwytem i intencją muzyczną, pozwalając fleciście na malowanie pełną paletą dźwiękowych kolorów.
4. Droga do płynności: Skale, arpeggia i schematy ćwiczeń
Dążenie do muzycznej biegłości na dowolnym instrumencie to podróż, która wymaga dyscypliny, struktury i inteligentnego podejścia do ćwiczeń. Olśniewające, pozornie bezwysiłkowe pasaże wykonywane przez wirtuozów nie są produktem samego wrodzonego geniuszu; są wynikiem niezliczonych godzin spędzonych na metodycznym budowaniu podstaw technicznej biegłości. Dla flecisty, rdzeń tej fundamentalnej pracy leży w systematycznej praktyce skal, arpeggiów i etiud. Nie są to jedynie żmudne ćwiczenia, które należy znosić, ale w rzeczywistości są to fundamentalne elementy składowe zachodniej muzyki. Są to wzorce, melodyczne i harmoniczne DNA, z których zbudowany jest cały repertuar. Opanowanie ich oznacza głębokie, dotykowe zrozumienie geografii instrumentu i języka samej muzyki. Skuteczny schemat ćwiczeń nie polega na samej ilości spędzonego czasu, ale na jego jakości i skupieniu.
Skale i arpeggia: Podstawa techniki
Skale (sekwencja nut poruszających się krok po kroku) i arpeggia (nuty akordu grane w sekwencji) są dla muzyka tym, czym ćwiczenia dla sportowca. Ćwiczą one palce, aby poruszać się po klawiszach instrumentu z szybkością, dokładnością i równomiernością. Ćwiczenie wszystkich skal durowych i molowych w pełnym zakresie gry na flecie gwarantuje, że żadna z tonacji nie będzie wydawać się obca lub niewygodna. Buduje to kompleksową mapę mentalną instrumentu, dzięki czemu gdy w utworze pojawia się trudny fragment, palce znają już drogę. W tej praktyce nie chodzi tylko o szybkie poruszanie palcami; chodzi o rozwinięcie płynnego, połączonego dotyku "legato", w którym przejście między nutami jest płynne, a ton pozostaje spójny.
Korzyści płynące z tej praktyki wykraczają daleko poza zręczność palców. Granie skal i arpeggiów z naciskiem na jakość tonu uczy flecistę utrzymywania pięknego brzmienia we wszystkich rejestrach i w trudnych kombinacjach palcowania. Ćwiczenie ich ze stroikiem rozwija wyczucie intonacji, trenując ucho i ucho do dokonywania mikroregulacji niezbędnych do grania idealnie nastrojonego. Co więcej, ćwiczenie ich z różnymi artykulacjami (slurred, single-tongued, double-tongued, staccato) buduje wszechstronne słownictwo artykulacyjne. W istocie, gamy i arpeggia są laboratorium, w którym wszystkie inne aspekty gry na flecie mogą być szlifowane i doskonalone. Są to ramy, na których budowana jest muzykalność. Światowej klasy fleciści i oddani nauczyciele, tacy jak Rebecca Fuller, często podkreślają, że konsekwentna, uważna praktyka skal nie podlega negocjacjom. learnfluteonline.com
Struktura skutecznej sesji treningowej
Powiedzenie "praktyka czyni mistrza" jest niekompletne. To "doskonała praktyka czyni mistrza". Siadanie z fletem i bezcelowe granie utworów przez godzinę jest znacznie mniej skuteczne niż ustrukturyzowana, 20-minutowa sesja. Dobrze zaprojektowana sesja ćwiczeniowa powinna być zrównoważona i kompleksowa, obejmując różne aspekty gry na flecie. Logiczna struktura może rozpocząć się od rozgrzewki skoncentrowanej na długich dźwiękach. Służy to skupieniu umysłu, ustanowieniu dobrego tonu i sprawdzeniu podstaw wsparcia oddechu i embouchure. Jest to moment kalibracji przed rozpoczęciem bardziej wymagającej pracy.
Po rozgrzewce sesja powinna przejść do pracy technicznej - gamy i arpeggia. Zamiast grać wszystkie 24 gamy każdego dnia, bardziej efektywny może być harmonogram rotacyjny. Na przykład, jednego dnia można skupić się na dźwiękach ostrych, a następnego na dźwiękach płaskich. Do tej części technicznej należy podchodzić z konkretnymi celami: idealna równość, precyzyjny rytm (używanie metronomu jest niezbędne) lub konkretna artykulacja. Po pracy technicznej można skupić się na etiudach. Etiudy to krótkie utwory zaprojektowane w celu rozwiązania konkretnego wyzwania technicznego, takiego jak zręczność palców, artykulacja lub kontrola dynamiki. Stanowią one pomost między ćwiczeniami mechanicznymi a rzeczywistą muzyką. Wreszcie, sesja może zakończyć się pracą nad bieżącym repertuarem - sonatami, koncertami lub fragmentami orkiestrowymi, których flecista się uczy. W tym momencie sesji palce są już rozgrzane, ton jest wyśrodkowany, a umysł skupiony, dzięki czemu praca nad repertuarem jest bardziej produktywna.
| Dzień | Rozgrzewka (10-15 min) | Praca techniczna (20-25 min) | Etiuda (15 min) | Repertuar (20+ min) |
|---|---|---|---|---|
| Poniedziałek | Długie dźwięki na gamie B, skupiające się na czystym, wyśrodkowanym dźwięku. | Gamy durowe i arpeggia: C, G, D, A, E. Skup się na legato i równomierności. Używaj metronomu. | Andersen op. 33 nr 1. Nacisk na zręczność palców i czystą artykulację. | Praca nad trudnymi fragmentami w bieżącym utworze solowym. Powolna, uważna praktyka. |
| Wtorek | Długie dźwięki z crescendo/diminuendo na nutach środkowego rejestru. | Skale molowe (harmoniczne i melodyczne) i arpeggia: a, e, b, f-ostre, c-ostre. | Etiuda nr 5 Berbiguiera. Koncentracja na rozwijaniu szybkości i lekkości. | Przejście przez utwór solowy dla zachowania ciągłości. Nagraj i skrytykuj. |
| Środa | Slury oktawowe (np. C4-C5, C#4-C#5) skupiające się na płynnych przejściach. | Gamy durowe i arpeggia: F, Bb, Eb, Ab, Db. Koncentracja na podwójnym tonowaniu. | Powtórz Etiudę Andersena, nieznacznie zwiększając tempo. Zachowaj kontrolę. | Nacisk na muzykalność: frazowanie, dynamika i charakter w repertuarze. |
| Czwartek | Ćwiczenia koloru tonu: graj pojedynczą nutę (np. G5) i zmieniaj kolor od jasnego do ciemnego. | Skale molowe (harmoniczne i melodyczne) i arpeggia: d, g, c, f, b-flat. | Nowa Etiuda: Köhler op. 33, nr 2. Nacisk na liryczną grę i kontrolę oddechu. | Praca nad fragmentami orkiestrowymi. Skup się na rytmie, intonacji i stylu. |
| Piątek | Długie dźwięki w trzecim (wysokim) rejestrze. Skup się na zrelaksowanym uchwycie i mocnym podparciu. | Skala chromatyczna, pełny zakres. Ćwiczenia z różnymi wzorcami rytmicznymi. Ćwiczenia tercji i kwarty. | Przegląd etiud z całego tygodnia. Wykonaj je jak na koncercie. | Pełne wykonanie bieżącego repertuaru. Identyfikacja słabych punktów na następny tydzień. |
| Sobota | Elastyczny harmonogram: skupienie się na konkretnej słabości zidentyfikowanej w ciągu tygodnia (np. reakcja w niskim rejestrze, intonacja określonej nuty). | Elastyczny harmonogram: praca nad szczególnie trudną skalą lub wzorem arpeggio. | Ćwiczenie czytania nut z nowym materiałem. | Słuchaj nagrań repertuaru profesjonalnych flecistów. Analizuj i czerp inspirację. |
| Niedziela | Odpoczynek lub bardzo lekka gra (np. ulubione proste melodie). | Odpoczynek. | Odpoczynek. | Odpoczynek. Trening mentalny i planowanie na nadchodzący tydzień. |
Uważny muzyk: Jakość ponad ilość
Najważniejszym elementem każdego schematu ćwiczeń jest nastawienie muzyka. Możliwe jest spędzanie godzin w sali ćwiczeń z błądzącym umysłem, osiągając bardzo niewiele. Możliwe jest również poczynienie znaczących postępów podczas krótkiej, bardzo skoncentrowanej sesji. Kluczem jest uważna praktyka. Oznacza to bycie w pełni obecnym i świadomym w każdym momencie gry. Podczas ćwiczenia gamy nie należy po prostu poruszać palcami. Należy uważnie słuchać równości tonu, precyzji rytmu, dokładności intonacji i jakości artykulacji. Kiedy pojawia się błąd, uważny muzyk nie przechodzi nad nim do porządku dziennego. Zatrzymuje się, analizuje źródło błędu - czy to palec poruszył się za późno? Utrata wsparcia powietrznego? napięty chwyt, a następnie opracowuje konkretne, ukierunkowane ćwiczenie, aby go skorygować. Może to oznaczać wyizolowanie dwóch lub trzech nut, w których wystąpił błąd i powtarzanie ich powoli i perfekcyjnie, aż do ustalenia prawidłowego wzorca ruchowego. Takie diagnostyczne podejście do rozwiązywania problemów jest tym, co odróżnia amatorów od profesjonalistów. Przekształca ono praktykę z obowiązku w angażujący proces odkrywania i doskonalenia, ścieżkę do prawdziwej płynności w grze na flecie i innych instrumentach. hurtownia instrumentów muzycznych.
5. Dusza instrumentu: Vibrato i zaawansowane techniki ekspresyjne
Techniczna biegłość, choć niezbędna, nie jest ostatecznym celem w podróży muzyka. Jest tylko środkiem transportu. Celem jest ekspresja - umiejętność nadania nutom emocji, charakteru i poczucia narracji. Wśród najpotężniejszych narzędzi ekspresyjnych dostępnych dla flecisty, vibrato zajmuje czołowe miejsce. Jest to mieniąca się, pulsująca jakość, która nadaje tonowi fletu ciepło, wokalny charakter i zdolność do głębokiej emocjonalnej głębi. Prosty, pozbawiony ozdób ton może być czysty i piękny, ale może też być sterylny. Wibrato wprowadza ludzki kwaver, przekształcając instrument ze zwykłego producenta dźwięków w śpiewający głos. Poza vibrato, paleta zaawansowanych technik związanych z barwą dźwięku i artykulacją pozwala fleciście kontrolować jeszcze szerszy zakres możliwości ekspresyjnych, naprawdę nadając dźwiękowi duszę.
Demistyfikacja wibrato: śpiewający strumień powietrza
Wibrato to regularna, pulsująca zmiana wysokości dźwięku. W przypadku flecistów prawidłowe, zdrowe vibrato nie pochodzi z gardła lub szczęki, ale z tych samych mięśni rdzenia, które kontrolują wspomaganie oddechu. Jest to w istocie seria delikatnych, kontrolowanych impulsów w strumieniu powietrza, tworzonych przez przeponę i mięśnie brzucha. Wyobraź sobie bardzo delikatne, rytmiczne pulsowanie "ha-ha-ha" pochodzące z głębi brzucha. Tworzy to subtelne zmiany prędkości powietrza, które z kolei powodują niewielkie, kontrolowane wahania wysokości dźwięku wokół centralnej częstotliwości nuty. To przeponowe vibrato jest najbardziej pożądaną formą, ponieważ jest zintegrowane z rdzeniem dźwięku i nie wprowadza napięcia do gardła ani do ucha, które mają pozostać stabilne i zrelaksowane.
Rozwijanie vibrato jest stopniowym procesem, który rozpoczyna się od kultywowania świadomości tych wspierających impulsów. Powszechnym ćwiczeniem jest ustawienie metronomu na wolne tempo (np. 60 bpm) i granie długiego tonu, wprowadzając jeden impuls na uderzenie, następnie dwa, potem trzy i cztery. Celem nie jest wytworzenie szerokiego, niekontrolowanego chybotania, ale delikatnej, równomiernej i migoczącej oscylacji. Szybkość i szerokość vibrato nie są stałe; są to zmienne ekspresyjne. Powolne, szerokie wibrato może przekazywać poczucie spokoju lub głębokiego smutku, podczas gdy szybsze, węższe wibrato może wywoływać podekscytowanie i intensywność. Dojrzały flecista ma "konfigurowalne" vibrato, które można dostosować do stylu muzyki i pożądanego efektu emocjonalnego. Powinien to być świadomy wybór artystyczny, a nie nieświadomy, stale obecny nawyk. Niektóre fragmenty, szczególnie w muzyce dawnej lub minimalistycznej, najlepiej grać czystym, prostym tonem.
Malowanie kolorem tonalnym: paleta flecisty
Podobnie jak malarz może mieszać kolory, aby stworzyć różne nastroje, flecista może zmieniać barwę lub kolor dźwięku. Pojedyncza nuta, powiedzmy A w środkowym rejestrze, może być zagrana na wiele sposobów. Może być jasna, błyszcząca i przeszywająca lub ciemna, aksamitna i ciepła. Ta kontrola nad barwą dźwięku jest kolejnym znakiem rozpoznawczym zaawansowanego gracza. Podstawowym mechanizmem zmiany barwy dźwięku jest chwyt i kształt jamy ustnej. Jaśniejszy dźwięk jest generalnie wytwarzany przy szybszym, bardziej skoncentrowanym strumieniu powietrza i nieco bardziej wysuniętej do przodu pozycji szczęki, tworząc więcej wysokich tonów w dźwięku. Ciemniejszy dźwięk uzyskuje się przy wolniejszym, szerszym strumieniu powietrza i bardziej zrelaksowanym, otwartym gardle i szczęce (myśląc o kształcie samogłoski "oh" lub "ah"), co podkreśla podstawową wysokość i niższe tony.
Eksplorowanie tych kolorów jest ćwiczeniem kreatywnym. Flecista może ćwiczyć branie pojedynczego długiego tonu i, bez zmiany wysokości lub dynamiki, płynnie przechodzić od najciemniejszego możliwego odcienia do najjaśniejszego. Wymaga to niewiarygodnie precyzyjnej kontroli nad wydechem i strumieniem powietrza. W kontekście muzycznym, umiejętność ta jest transformująca. Flecista może użyć jaśniejszej, bardziej skoncentrowanej barwy do triumfalnego, fanfarowego fragmentu i ciemniejszej, cieplejszej barwy do lirycznej, introspektywnej melodii. Ta zdolność do "malowania" dźwiękiem dodaje warstwę wyrafinowania i głębi do interpretacji, czyniąc wykonanie prawdziwie trójwymiarowym doświadczeniem. To wykracza poza granie nut do rzeźbienia samego dźwięku.
Techniki rozszerzone: Przesuwanie granic
W XX i XXI wieku kompozytorzy i wykonawcy radykalnie rozszerzyli słownictwo dźwiękowe fletu, rozwijając szereg "rozszerzonych technik", które wykraczają poza tradycyjną rolę instrumentu. Chociaż nie jest to wymagane w przypadku większości klasycznego repertuaru, świadomość tych technik świadczy o wszechstronnym zrozumieniu potencjału instrumentu. Jedną z najczęstszych jest trzepotanie językiem, w którym gracz szybko zwija czubek języka (jak zwijanie "r" w języku hiszpańskim) podczas grania nuty. Tworzy to wirujący, perkusyjny efekt. Kliknięcia klawiszy, wytwarzane przez uderzanie palcami w klawisze bez dmuchania, mogą być używane do uzyskania efektu rytmicznego. Harmonie lub podteksty można wyizolować, używając określonych palców i regulacji w celu wytworzenia wysokich, eterycznych dźwięków nad podstawową nutą.
Bardziej zaawansowane techniki obejmują multifonikę, jednoczesne wytwarzanie dwóch lub więcej nut, osiągane poprzez złożone palcowanie i precyzyjną kontrolę nad wklęsłością. Śpiewanie i granie w tym samym czasie tworzy bogatą, akordową teksturę. Techniki te nie są zwykłymi sztuczkami; w rękach wykwalifikowanego kompozytora i wykonawcy są potężnymi narzędziami ekspresyjnymi, które mogą tworzyć dźwięki od pięknych po niepokojące. Eksplorowanie ich rozszerza koncepcję flecisty na temat tego, co jest możliwe na instrumencie, wspierając kreatywność i jeszcze głębszą kontrolę nad skomplikowaną relacją między oddechem, ciałem i fletem. Reprezentują one najnowocześniejsze podejście do gry na flecie w dzisiejszych czasach.
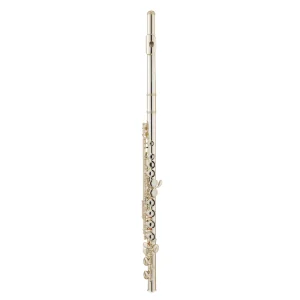
6. Instrument jako partner: Wybór, pielęgnacja i zrozumienie fletu
Flet jest czymś więcej niż narzędziem; dla oddanego muzyka staje się partnerem w procesie twórczym. To partnerstwo rozwija się dzięki zrozumieniu, szacunkowi i skrupulatnej opiece. Wybór instrumentu, jego cechy fizyczne i stan techniczny mają ogromny wpływ na zdolność gracza do uzyskania pożądanego dźwięku i wykonania trudnych pasaży. Flet, który jest dobrze dopasowany do gracza i utrzymywany w optymalnym stanie, może wydawać się naturalnym przedłużeniem ciała, reagującym bez wysiłku na intencje muzyka. I odwrotnie, źle dopasowany lub źle utrzymany instrument może być ciągłym źródłem frustracji, walcząc z graczem na każdym kroku i utrudniając postępy. Zrozumienie anatomii fletu, materiałów, z których jest wykonany i procedur wymaganych do jego utrzymania jest podstawowym aspektem odpowiedzialnego muzykowania. Jest to potwierdzenie, że muzyka płynie nie tylko z gracza, ale z synergii między graczem a jego instrumentem.
Anatomia współczesnego fletu
Flet poprzeczny, jaki znamy dzisiaj, składa się zazwyczaj z trzech sekcji: główki, korpusu i stopki. Główka jest miejscem, z którego pochodzi dźwięk. Zawiera płytkę wargową, na której gracz opiera podbródek, oraz otwór strunowy, przez który wdmuchiwane jest powietrze. Precyzyjne wycięcie i kształt otworu embouchure są kluczowymi czynnikami determinującymi charakter tonalny i szybkość reakcji fletu. Wewnątrz główki, korek i korona działają jak zatyczka; jego prawidłowe położenie jest kluczowe dla ogólnej intonacji instrumentu. Renomowany dostawca fletów może zaoferować różne style główek, aby dopasować się do różnych graczy.
Korpus jest najdłuższą częścią fletu i zawiera większość klawiszy. Klawisze te, dzięki złożonemu systemowi prętów, sprężyn i podkładek, otwierają i zamykają otwory tonowe, zmieniając w ten sposób efektywną długość kolumny powietrza i wytwarzając różne wysokości dźwięku. Stopa jest najkrótszą sekcją i rozszerza zakres instrumentu w dół. Większość fletów posiada przystawkę C, która pozwala na granie najniższej nuty środkowego C. Niektóre profesjonalne modele posiadają przystawkę B, która dodaje jeszcze jeden klawisz i pozwala na granie niskiego B. To nie tylko rozszerza zakres, ale może również subtelnie wpływać na brzmienie i reakcję górnych rejestrów. Zrozumienie, w jaki sposób te części pasują do siebie i jakie są ich funkcje, jest pierwszym krokiem w kierunku głębszej relacji z instrumentem.
Materiały i ich wpływ: Srebro, złoto i nie tylko
Flety są wykonane z różnych materiałów i chociaż umiejętności gracza są zdecydowanie najważniejszym czynnikiem w produkcji tonów, materiał, z którego wykonany jest flet, ma wpływ na jego brzmienie i odczucia. Modele studenckie są często wykonane ze stopu niklu i srebra, który jest trwały i niedrogi. W miarę postępów gracze zazwyczaj przechodzą na instrumenty wykonane z litego srebra (często srebra próby 925, które ma czystość 92,5%). Srebro jest cenione za jego zdolność do wytwarzania wspaniałego, czystego i elastycznego brzmienia z szeroką paletą kolorów. Oferuje pewien "pierścień" i responsywność, które wielu graczy uważa za bardzo atrakcyjne.
Profesjonalne flety są często wykonane z metali szlachetnych, takich jak złoto lub platyna. Złote flety znane są z ciepłego, bogatego i ciemnego brzmienia. Mogą oferować potężny, złożony ton, który dobrze prezentuje się w dużej sali. Im wyższa próba złota (np. 14k lub 18k), tym cieplejsze i ciemniejsze brzmienie. Platyna, bardzo gęsty metal, może wytwarzać jeszcze ciemniejszy, mocniejszy i intensywniej skupiony dźwięk. Flety drewniane, zwykle wykonane z drewna grenadilla, są również popularne, szczególnie wśród graczy poszukujących dźwięku, który dobrze komponuje się z innymi instrumentami dętymi drewnianymi. Oferują one wyjątkowo łagodne, słodkie i złożone brzmienie. Wybór materiału jest bardzo indywidualny i zależy od pożądanej przez gracza koncepcji dźwięku, stylu gry i budżetu. Jest to ważna decyzja w życiu flecisty.
Rytuał pielęgnacji: Czyszczenie i konserwacja
Flet to precyzyjny instrument z delikatnymi ruchomymi częściami. Regularna, właściwa pielęgnacja nie jest opcjonalna; jest niezbędna do utrzymania jego grywalności i wartości. Po każdej sesji gry, wnętrze fletu musi zostać przetarte w celu usunięcia wilgoci. W tym celu należy użyć patyczka do czyszczenia i miękkiej, chłonnej ściereczki (np. jedwabnej lub z mikrofibry). Pozostawienie wilgoci wewnątrz instrumentu może spowodować, że wkładki staną się lepkie i nasiąknięte wodą, co ostatecznie doprowadzi do ich zniszczenia i nieszczelności. Nieszczelna wkładka może sprawić, że flet będzie prawie nie do grania, powodując, że nuty będą niewyraźne, słabe lub w ogóle nie będą mówić.
Zewnętrzną powierzchnię fletu należy delikatnie przetrzeć miękką ściereczką do polerowania, aby usunąć odciski palców i zapobiec matowieniu. Bardzo ważne jest, aby unikać używania pasty do srebra, ponieważ związki ścierne mogą uszkodzić delikatne podkładki i mechanizm. Sam mechanizm, z jego skomplikowanym systemem sprężyn i śrub, nie powinien być regulowany przez amatora. Przynajmniej raz w roku flet powinien zostać zabrany do wykwalifikowanego technika w celu przeprowadzenia "czyszczenia, oliwienia i regulacji" (COA). Podczas COA technik rozbierze instrument, wyczyści mechanizm, wymieni zużyte podkładki lub korki, naoliwi ruchome części i dokona precyzyjnych regulacji, aby upewnić się, że wszystkie klawisze są idealnie uszczelnione, a akcja jest lekka i cicha. Regularna profesjonalna konserwacja to inwestycja, która procentuje w postaci niezawodnego, responsywnego i pięknie brzmiącego instrumentu. Właściwa pielęgnacja obejmuje również posiadanie odpowiednich akcesoriów do instrumentów muzycznych, takich jak solidny futerał i środki czyszczące. Takie zaangażowanie w konserwację odzwierciedla szacunek muzyka do swojego rzemiosła i partnera instrumentalnego.
7. Sposób myślenia wykonawcy: Przezwyciężanie tremy i kultywowanie muzykalności
Podróż nauki gry na flecie kończy się nie w sali ćwiczeń, ale na scenie, w zespole lub w dowolnym miejscu, w którym muzyka jest dzielona z innymi. To właśnie w akcie występu zbiegają się techniczne, intelektualne i emocjonalne aspekty muzykalności. Jednak ten akt dzielenia się może być również źródłem ogromnego niepokoju. Strach przed oceną, presja bycia doskonałym i fizjologiczne objawy zdenerwowania - znane jako trema lub lęk przed występem - mogą sabotować nawet najlepiej przygotowanego muzyka. Pokonanie tych psychologicznych przeszkód jest tak samo ważną częścią treningu flecisty, jak opanowanie skal czy vibrato. Poza zwykłym radzeniem sobie ze strachem, ostatecznym celem jest kultywowanie stanu prawdziwej muzykalności, sposobu myślenia, w którym wykonawca wykracza poza skupienie się na technicznym wykonaniu nut i wchodzi w stan ekspresyjnego przepływu, przekazując emocjonalny rdzeń muzyki bezpośrednio słuchaczowi.
Zrozumienie i okiełznanie lęku przed wydajnością
Lęk przed wynikami jest naturalną ludzką reakcją. Jest to mechanizm organizmu "walcz lub uciekaj", uruchamiany przez postrzegane zagrożenie publiczną kontrolą. Objawy są znane wielu wykonawcom: przyspieszone bicie serca, spocone dłonie, płytki oddech, drżenie rąk i umysł, który albo staje się pusty, albo wypełniony negatywnymi myślami. Pierwszym krokiem w radzeniu sobie z tym niepokojem jest jego zmiana. Zamiast postrzegać te objawy jako oznakę zbliżającej się porażki, można je zinterpretować jako sposób organizmu na "przygotowanie się" do ważnego wydarzenia. Adrenalina, która powoduje przyspieszone bicie serca, może również zapewnić energię i skupienie.
Kilka praktycznych strategii może pomóc okiełznać tę reakcję. Dokładne przygotowanie jest najsilniejszym antidotum na strach. Znajomość muzyki tak dobrze, że jest ona zakorzeniona w pamięci mięśniowej, zmniejsza obciążenie poznawcze podczas występu, uwalniając przestrzeń mentalną, aby skupić się na ekspresji, a nie tylko na przetrwaniu. Próba mentalna lub wizualizacja to kolejne potężne narzędzie. Polega ona na żywym wyobrażaniu sobie, że cały występ przebiega idealnie, od wejścia na scenę do ostatniego ukłonu. Ta praktyka pomaga stworzyć mentalny plan sukcesu. W dniu występu głębokie, powolne ćwiczenia oddechowe mogą uspokoić układ nerwowy. Skupienie się na fizycznym odczuwaniu oddechu, a nie na niespokojnych myślach, może uziemić wykonawcę w chwili obecnej. Pomocne jest również pamiętanie, że publiczność jest generalnie wspierająca; przyszli cieszyć się muzyką, a nie szukać błędów. Ta perspektywa, kultywowana przez organizacje wspierające muzyków, takie jak te opisane na stronie strona o nasmoże zmienić sposób myślenia wykonawcy ze strachu na hojne dzielenie się.
Od nut do narracji: Istota muzykalności
Muzykalność to nieuchwytna cecha, która oddziela technika od artysty. Jest to umiejętność spojrzenia na partyturę - zbiór kropek i linii na stronie - i zobaczenia historii, emocji, krajobrazu. Wiąże się to z dokonywaniem świadomych i osobistych wyborów dotyczących frazowania, taktowania, barwy dźwięku i dynamiki, aby ukształtować muzykę w spójną i przekonującą narrację. Proces ten rozpoczyna się od głębokiego zrozumienia samej muzyki. Jaki jest kontekst historyczny? Jakie były intencje kompozytora? Jaka jest struktura harmoniczna i gdzie znajdują się punkty napięcia i zwolnienia?
Analiza jest jednak tylko punktem wyjścia. Prawdziwa muzykalność bierze się z połączenia intelektualnego zrozumienia z osobistą, emocjonalną reakcją. Flecista musi zadać sobie pytanie: Jakie uczucie wywołuje ta fraza? Czy jest radosna, melancholijna, poruszona, spokojna? Następnie musi wykorzystać cały swój arsenał umiejętności technicznych - kontrolę oddechu, artykulację, vibrato, zakres dynamiki - aby przełożyć to uczucie na dźwięk. Fraza muzyczna jest jak zdanie. Ma początek, środek i koniec. Powinna mieć naturalny łuk, często narastający w kierunku szczytu, a następnie opadający. Flecista musi nauczyć się "oddychać" frazami, tworząc poczucie ruchu do przodu i kierunku. To właśnie sprawia, że występ jest przekonujący. Słuchacz nie słyszy tylko sekwencji nut; jest zabierany w emocjonalną podróż.
Radość tworzenia muzyki: Odnaleźć swój głos
Ostatecznym celem gry na flecie, czy jakimkolwiek innym instrumencie, jest znalezienie własnego, niepowtarzalnego głosu. Chociaż ważne jest, aby słuchać i uczyć się od wielkich wykonawców, naśladownictwo nie jest ostatecznym celem. Każda osoba wnosi do swojej muzyki własne doświadczenia życiowe, osobowość i krajobraz emocjonalny. Instrument staje się kanałem do wyrażania siebie. Jest to prawdą niezależnie od tego, czy ktoś gra na flecie, eksploruje uduchowione zawodzenie harmonijki ustnej, czy też opanowuje skomplikowane miechy akordeonu. Każdy instrument oferuje inny dialekt uniwersalnego języka muzyki.
Kultywowanie tego osobistego głosu wymaga wrażliwości i odwagi. Oznacza to podejmowanie ryzyka, dokonywanie wyborów interpretacyjnych, które są autentyczne dla siebie i skupianie się na radości z procesu twórczego, a nie na zewnętrznej walidacji. Oznacza to pamiętanie, dlaczego w ogóle rozpoczęło się tę podróż: z miłości do dźwięku, z dreszczyku emocji tworzenia czegoś pięknego, z głębokiej więzi, jaką muzyka tworzy między wykonawcą, kompozytorem i słuchaczem. Kiedy flecista może stanąć na scenie, nie w strachu, ale z poczuciem radosnego celu, gotowy podzielić się swoją unikalną interpretacją muzyki, osiągnął poziom mistrzostwa, który wykracza poza zwykłą technikę. Stał się nie tylko graczem, ale prawdziwym muzykiem.
Często zadawane pytania
- 1. Dlaczego mój flet brzmi tak zwiewnie i słabo?
- Zwiewny lub słaby dźwięk jest jednym z najczęstszych problemów rozwijających się flecistów i prawie zawsze wskazuje na problem z embouchure lub skupieniem strumienia powietrza. Przyczyną jest zazwyczaj zbyt duża lub okrągła apertura (otwór między wargami), która powoduje, że powietrze jest rozproszone, a nie skoncentrowane. Może to być również spowodowane skierowaniem strumienia powietrza zbyt wysoko (w poprzek górnej części otworu) lub zbyt nisko (zbyt daleko w dół). Aby to naprawić, ćwicz tylko z headjointem. Dąż do uzyskania czystego, dzwoniącego tonu, eksperymentując z lekkim zwijaniem fletu w kierunku do siebie i od siebie oraz dostosowując kształt warg. Pomyśl o stworzeniu małej, płaskiej, skupionej laserowo wstęgi powietrza i wyceluj ją w przeciwległą wewnętrzną ścianę strunociągu. Konsekwentne ćwiczenie długich tonów jest najlepszym sposobem na zbudowanie pamięci mięśniowej dla czystego, wyśrodkowanego tonu.
- 2. Jaka jest różnica między fletem z otwartym i zamkniętym otworem i który z nich powinienem wybrać?
- Różnica polega na klawiszach. Na flecie z zamkniętym otworem (lub plateau) klawisze, które są wciskane palcami, są solidnymi kawałkami metalu. W przypadku fletu z otwartym otworem (lub modelu francuskiego) pięć z tych klawiszy ma otwór pośrodku. Flety z zamkniętym otworem są często zalecane dla młodych początkujących, ponieważ są bardziej wyrozumiałe dla nieprecyzyjnego ułożenia dłoni. Wielu nauczycieli zaleca jednak rozpoczęcie gry na modelu z otwartym otworem. Flety z otwartym otworem wymagają od gracza precyzyjnego ułożenia palców na środku klawiszy, co sprzyja lepszemu ułożeniu dłoni od samego początku. Pozwalają również na zaawansowane techniki, takie jak gięcie nut i niektóre multifony. Dla poważnego ucznia flet z otwartym otworem jest generalnie lepszą długoterminową inwestycją. Wybór ostatecznie zależy od wieku gracza, rozmiaru dłoni i zaleceń nauczyciela.
- 3. Jak długo trwa nauka gry na flecie?
- Jest to kwestia bardzo indywidualna, ponieważ postęp zależy od jakości i konsekwencji ćwiczeń, jakości nauczania i naturalnych predyspozycji ucznia. Zaangażowany początkujący ćwiczący 30 minut dziennie może spodziewać się przyzwoitego tonu i grania prostych melodii w ciągu kilku miesięcy. Osiągnięcie średniozaawansowanej biegłości - granie skal w wielu oktawach, posiadanie podstawowej kontroli nad dynamiką i artykulacją oraz granie standardowych etiud i utworów solowych - może zająć od 2 do 5 lat. Osiągnięcie poziomu zaawansowanego lub profesjonalnego to zadanie na całe życie. Kluczem, jak zauważa wielu nauczycieli, nie jest skupienie się na celu, ale cieszenie się procesem codziennego doskonalenia. learnfluteonline.com
- 4. Moje palce nie poruszają się wystarczająco szybko w trudnych pasażach. Co mogę zrobić?
- Kluczem do szybkości nie jest próba poruszania się szybko; jest nim wydajność i rozluźnienie. Napięte mięśnie to powolne mięśnie. Najpierw sprawdź pozycję dłoni. Upewnij się, że nie chwytasz fletu, a palce są zakrzywione i blisko klawiszy. Narzędziem numer jeden do budowania szybkości jest metronom. Wyodrębnij trudny fragment i zacznij grać go w tempie tak wolnym, że niemożliwe jest popełnienie błędu. Skup się na perfekcyjnym, równym rytmie i zrelaksowanych, wydajnych ruchach palców. Gdy uda ci się zagrać go idealnie kilka razy z rzędu, zwiększ prędkość metronomu o bardzo mały przyrost (2-4 bpm). Powtarzaj ten proces przez wiele sesji treningowych. Takie metodyczne, cierpliwe podejście buduje czystą, niezawodną technikę znacznie skuteczniej niż próba wymuszenia szybkości.
- 5. Czy gra na flecie powinna sprawiać ból moim dłoniom, plecom lub ramionom?
- Ból jest sygnałem od ciała, że coś jest nie tak. Podczas gdy pewne zmęczenie mięśni jest normalne, gdy zaczynasz, uporczywy lub ostry ból jest czerwoną flagą dla problemów z postawą lub pozycją rąk. Ból ramion i pleców często wynika z garbienia się lub nadmiernego napięcia w górnej części ciała. Ból dłoni i nadgarstków może być spowodowany zbyt mocnym trzymaniem fletu lub trzymaniem nadgarstków pod ekstremalnym, nienaturalnym kątem. Ważne jest, aby natychmiast zająć się tymi kwestiami, aby zapobiec długotrwałym powtarzającym się urazom. Zapoznaj się z zasadami prawidłowej postawy i trzypunktowym systemem równowagi podczas trzymania fletu. Jeśli ból nie ustępuje, skonsultuj się z doświadczonym nauczycielem lub specjalistą od urazów muzycznych. Jak napisano w jednym ze źródeł, ważne jest, aby zająć się tymi fizycznymi aspektami gry, aby uniknąć kontuzji. learnfluteonline.com
Wnioski
Gra na flecie to głębokie zaangażowanie w siebie, dyscyplina, która splata ze sobą to, co fizyczne, intelektualne i emocjonalne. Zaczyna się od elementarnego aktu przekształcania oddechu w dźwięk, procesu regulowanego przez subtelną mechanikę ciała i precyzyjną akustykę instrumentu. Z tego fundamentalnego tonu budowana jest złożona architektura techniki - struktura postawy, palcowania i artykulacji, która zapewnia ramy dla płynnej ekspresji. Techniczne mistrzostwo nie jest jednak celem samym w sobie. Jest to środek, za pomocą którego muzyk uzyskuje dostęp do głębszego języka muzyki, języka dynamicznego konturu, barwy i emocjonalnej narracji. Podróż ta wymaga cierpliwości, ustrukturyzowanej praktyki i uważnej świadomości, która przekształca powtarzalne ćwiczenia w akty doskonalenia. Ostatecznie flet przestaje być zewnętrznym przedmiotem i staje się rezonującym partnerem, głosem, dzięki któremu muzyk może dzielić się swoim unikalnym zrozumieniem duszy muzyki. Ta synteza rzemiosła i artyzmu jest sercem muzycznych poszukiwań.
Referencje
- Fuller, R. (2022, 14 stycznia). Jak długo trwa nauka gry na flecie? Nauka gry na flecie online. https://learnfluteonline.com/how-long-does-it-take-to-learn-to-play-the-flute/
- Fuller, R. (2023, 29 marca). Czy grając na flecie można się zranić? Nauka gry na flecie online. https://learnfluteonline.com/can-you-get-hurt-playing-the-flute/
- Fuller, R. (2023, 6 czerwca). 2 rzeczy, o których chciałbym wiedzieć przed rozpoczęciem nauki gry na flecie. Nauka gry na flecie online. https://learnfluteonline.com/2-things-i-wish-id-known-before-starting-the-flute/
- Kenny, D. T. (2005). Systematyczny przegląd metod leczenia lęku przed występami muzycznymi. Anxiety, Stress, & Coping, 18(3), 183-208. https://doi.orgorg/10.1080/10615800500122222
- Powell, A. (2007). Flet. Yale University Press. https://yalebooks.yale.edu/book/9780300114999/the-flute/
- Shepard, M. (n.d.). Strona fletu Marka Sheparda. http://www.markshep.com/flute/index.html
- Wye, T. (1993). Prawidłowa gra na flecie: A companion to the practice books. Novello & Co Ltd.
- Fletcher, N. H., & Rossing, T. D. (1998). Fizyka instrumentów muzycznych. Springer. https://doi.org/10.1007/978-1-4419-3120-7